Archive

Fly Fishing

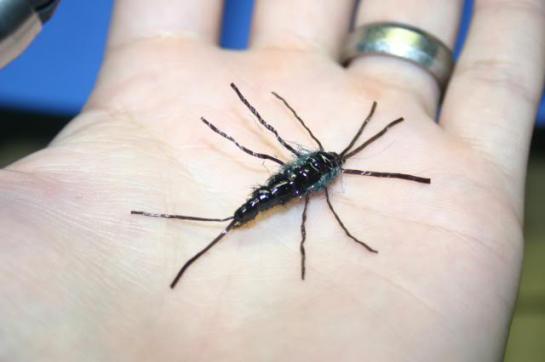
Spent a long weekend in Grand Isle and for the first time ever I wasn’t down there primarily to fish. I was actually down there to work. It was my first time doing oil spill clean up, but, as my luck would have it, working conditions remained unfavorable nearly the entire time I was there, providing me with more than enough time to fish, and wouldn’t you know it the company just so happens to have rented a camp on the water for the crew to stay out of. The weather, which started crappy, turned out to be pretty awesome as well, so win-win for this guy!

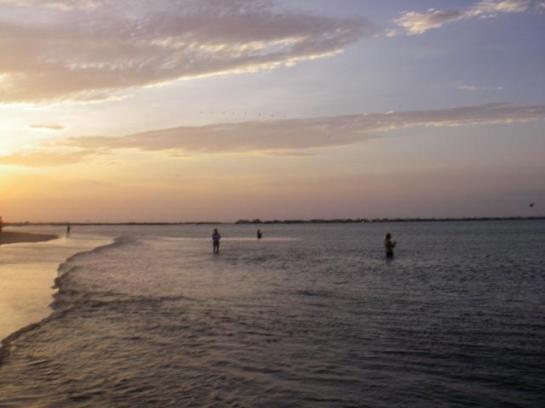
I made it down Friday with enough time to hit the beach for some surf fishing. The wind was rough when I first made it out there, but as the evening progressed it calmed. And as is normally the case in June, the speck fishing was great where you could find good looking water. I wouldn’t say nearly every cast, but the catching was steady enough to keep me out there until dark. Unfortunately there weren’t too many keeper size out of the bunch, but there were a couple fish that just flat broke me off. I thought they might have been bull reds and as it got dark I had the pleasure of experiencing something I’ve only seen on YouTube, a redfish blitz! A school of bulls was crashing bait within casting range of the shore and a few other folks fishing down the beach were hooked up. I was ill-equipped throwing the popping cork, but I still tried. I even had a couple hit the cork itself, but none ever touched the Gulp! 4″ swimming mullet that was underneath. Outfishes live bait my ass! It was still amazing to witness.

IMGP8175

IMGP8176

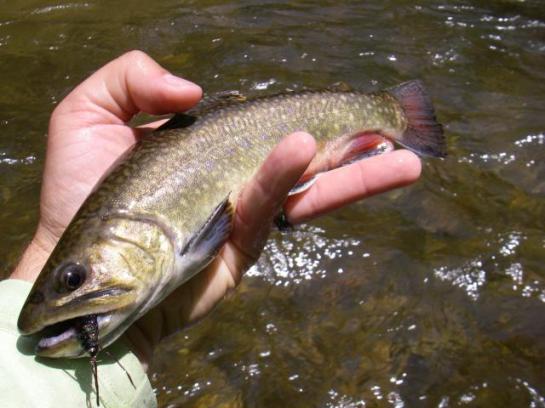
Saturday morning a front moved through and rained out work. After the rain subsided I headed back to the surf. It was still up and waves were still gnarly, but fish were still there. The fishing was slower than the day before, but once I switched from a popping cork to a slow retrieved double speck rig it picked up. Size was similar to the day before with only a few keepers brought to hand, but I had enough specks to keep me happy. I headed back to the camp for lunch and to gameplan for the afternoon.

IMG_0922

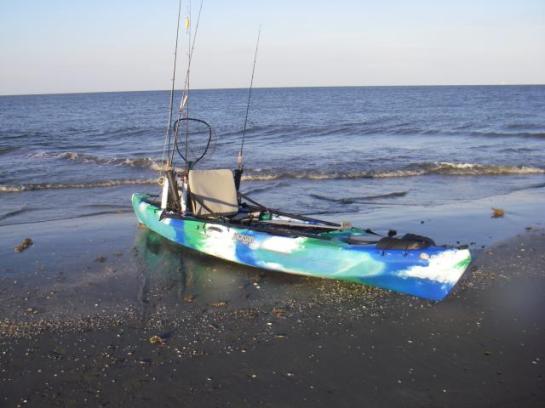
I figured a trip to Grand Isle wouldn’t be the same without bringing the kayak down, so I decided to launch into the bay to see if I could hunt down some reds. Winds were light at first and allowed me to sight fish a nice red with my fly rod of nearly 28″, but they picked up throughout the afternoon and made paddling pretty tough and fly fishing downright impossible. At times it felt like I was always paddling upwind, but I was able to find a few places that provided some cover and because tides were low, I was still able to sight fish. I ended up keeping three that were perfect eating size and releasing two other upper slot reds. So despite the lousy conditions I felt I had a pretty good day.

IMGP8181

IMG_0926

IMG_0929

I knew the forecast looked really nice for Sunday, but I assumed that there wasn’t even a chance I’d fish because I was sure we’d have to make up for lost time Saturday. Well, apparently the island we were working on had so much rain that the ground was super saturated and was nightmare for data collection, so it was called around lunch and I had time to fish the afternoon. I headed straight to the surf, but this time I was able to launch the kayak and try a different area that might hold bigger trout. I tried topwater because conditions seemed perfect, but didn’t even get a look. Same with the popping cork. Started slow rolling a jig and began picking up hits nearly every cast. Just like when I was wade fishing though the specks were mainly small with a few keepers here and there. The action was so consistent I couldn’t leave that spot – even when swimmers showed up, I just fished around them.

IMG_0935

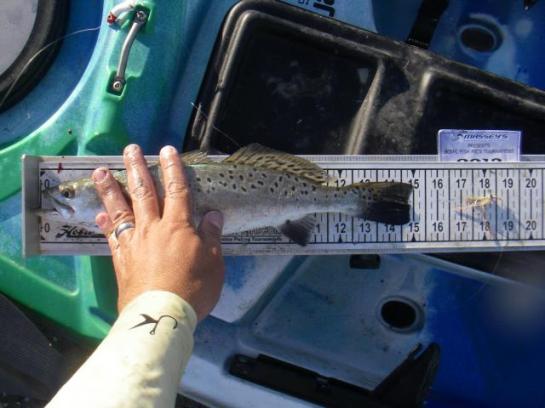
Soon I got a tremendous strike, it was the trout I was after. I felt the slow head shake of a big trout and after not long into the fight the fish came off. I was a bit heartbroken, but what can you do? Not long after the tide went from incoming to falling, I have never actually noticed it change like that, I guess because I’m always fishing the marsh, but this was like someone flipped a switch. Fish quit hitting where I was fishing and I was having trouble staying in my spot, so I headed in to wade fish. I grabbed the fly rod and started picking up trout on a dropper-popper rig with every fish landed on the dropper. I did have some fish come out of the water for the popper, but I was never able to get a hook in them. I was actually able to land specks over 14″ on both the fly rod and the kayak so I had them weighed over at Bridge Side for the CCA STAR tournament. I know they won’t place but they still do the raffle in each division and after winning it last year it seems foolish to not enter it again.

IMGP8180

IMGP8178

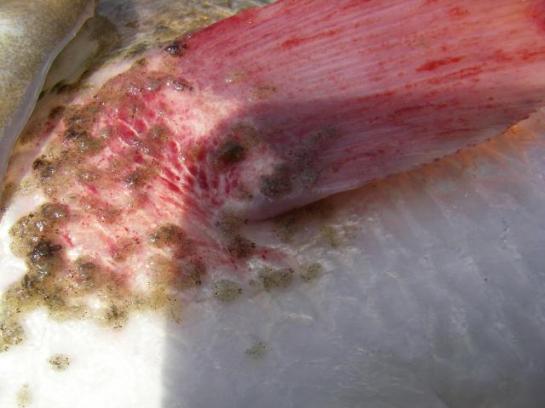
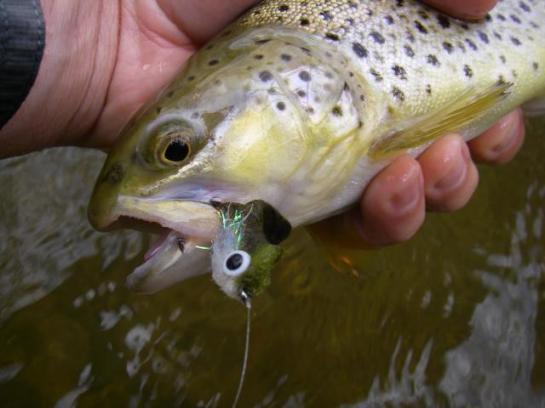
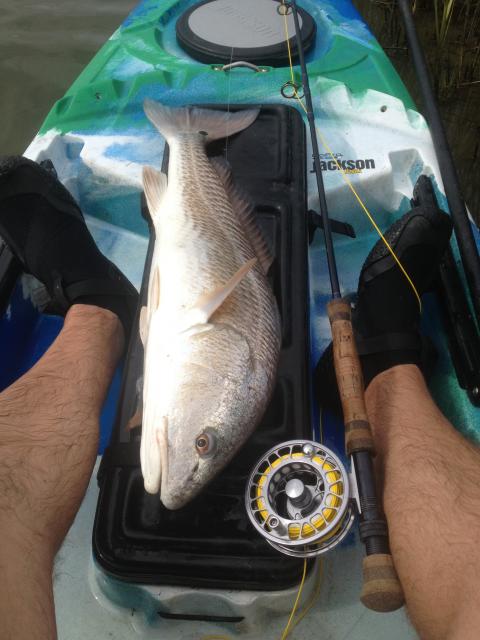
Monday was my last day down there and wouldn’t you know it work was the same as the day before. We drove all the way out to this island only to turn around and head back in because conditions were the same, but I ain’t complaining, I had another afternoon to fish. This time I launched at the camp and headed out to the bay from there. I was seeing reds, but I wasn’t making the casts I needed to make. Finally I got a nice 27″ red to eat a fly and I noticed he had this bright red fin. When I got him in the boat it looked to be inflamed from sea lice, I’m guessing he was fresh out the ocean to be in that condition. I tagged him and let him go. I missed a few more opportunities at fish before finally sticking an 18″er on the way back to camp. It wasn’t a banner day, but that didn’t really matter, I was down in Grand Isle fishing on a Monday – that never happens!

IMG_0941

IMGP8182

IMGP8184

IMG_0943

IMG_0944

June’s fly of the month is one that I had some success with for trout in Georgia back in April, it should also be a killer bass and redfish fly though as it’s one of the most realistic looking flies I’ve seen in the water. Blake tied this up and provides his instructions below:

Materials:

– Flashabou

– Zonker strip

– Flash chenille

– Wool roving

– Doll eyes

Step 1. Use your bodkin to punch a hole at the end of the zonker strip. Use your bobbin threader to pull a few pieces of flash through the hole.

IMG_0785

IMG_0786

IMG_0787

Step 2. Mount a needle in the vice and start the thread on the end with only a few wraps.

IMG_0788

Step 3. Tie the flash together behind the zonker keeping it from falling out. I’m sure I could have just tied it in to the shank of the hook, but I just wanted a little flash at the back of the fly, so I did it this way.

IMG_0789

Step 4. Whip finish, pull the whole thing off the needle, use your choice of cement on the threads.

IMG_0790

Step 5. Mount hook in vice and lay down a thread base to the bend of the hook.

IMG_0791

Step 6. Add whatever amount of lead that you want along the hook shank and cover with thread.

IMG_0792

Step 7. Tie in zonker with a couple wraps at the start of the hook bend.

IMG_0793

Step 8. Tie in the flash chenille and palmer up the fly leaving enough room for the zonker tie in and the head.

IMG_0794

IMG_0795

Step 9. Do your best to part the flash on the top of the hook, pull over the strip, and tie it in.

IMG_0796

Step 10. Use whatever material you like to make the head. I used some wool roving that I got from Joann fabric. It’s a lot of material. I don’t remember the cost, but since it isn’t made for fly tying, I’m sure its cheap. I skipped some steps here by accident. I tied one clump of white on the bottom, then one clump of green on the top. Pull back and make a couple wraps on the shank to secure, and then repeat behind the hook eye. I only used 2 separate tie ins, but if you use less material, you may need more. You end up with something like this.

IMG_0797

IMG_0798

Step 11. Whip finish behind the hook eye and trim the fly to the desired shape. I like to go pretty tall on the top and bottom, and pretty short on the sides.

IMG_0799

Step 12. Cut the extra plastic off the back of a doll eye and glue on. I like to use household goop. It doesn’t run, gets in the fibers well, and holds the eyes on well. A little more trimming after the eyes are on and I’m left with a finished fly.

IMG_0802

IMG_0804

Enjoy, and as always, a little proof of concept:

IMG_0720

IMGP7872

IMGP7878

May’s fly of the month is a stonefly pattern that Blake had tied up that proved very effective on the trout at the cabin. Blake notes that “this fly is an amalgam of several different patterns. I just chose the different things I liked from them and put them all together.” Truth is, this wasn’t the pattern that slayed them on Thursday, that was a Pat’s Rubber Legs, a much easier tie, but what fun is that for a SBS.  Pick whichever you prefer, as Blake so eloquently stated, “or you could just tie the easier and equally effective “pickle” and not be as ticked off when you lose one on a snag.”

Materials:

– 3x long curved shank hook

– Spanflex legs and ribbing

– Stretch skin for back and casing

– Black and peacock ice dub

– Bead

– Lead wire of various sizes 

Step 1. Put bead on hook and start thread behind the eye. Make a small thread base and coat with glue.

IMG_0753

Step 2. Tie in legs to create two antennae. Push bead up over the tie in area to make sure that it will fit. Pull bead back, then whip finish and part off the thread. Add some glue to the tie in area and push bead to the eye to secure it.

IMG_0755


Step 3. Start to build up the body with a layer of lead along the shank up to the back of the bead. I use a good bit of lead on this fly to reduce the amount of shot that I have to put on the line to get it down to where the fish are.

IMG_0756


Step 4. Start thread and lay down a layer over the lead.

IMG_0757


Step 5. Tie in a piece of lead length wise along either side of the hook shank. I used a larger diameter lead wire here. My goal is to make a heavy, vertically compressed body shape with a gradual taper from tail to head.

IMG_0758

IMG_0759

Step 6. Tie in two legs at the back of the fly just as you did at the eye. Notice the shape of the body from the top view above to the one below,  vertically compressed with a gradual taper from tail to head.

IMG_0760

Step 7. Tie in another piece of spanflex for the ribbing.

IMG_0761

Step 8. Tie in the stretchy nymph skin for the back/casing.

IMG_0763

Step 9. Dub the body to a point a little over half way point. I like to make a little contrast between the abdomen and the thorax so I used black ice dub here and peacock ice dub in a future step.

IMG_0764

Step 10. Pull the shell back up and tie it in.

IMG_0765

Step 11. Rib the abdomen.

IMG_0766

IMG_0767

Step 12. Cut off the ribbing material and pull the casing back. Tidy up the shank to the spot right before the dubbing starts.

IMG_0768

Step 13. Tie in a leg on either side. Dub around the legs and a little down the hook shank.

IMG_0769

IMG_0770

Step 14. Pull the shell casing over and tie it in. then pull it back and prepare the hook shank for the next leg tie in.

IMG_0771

Step 15. Tie in another set of legs, dub, then pull shell casing forward same as you did above.

IMG_0772

IMG_0773

IMG_0774

Step 16. Tie in two more legs. I tied them more forward facing. Dub between the bead and the casing. Pull casing over and tie it in between the legs and the bead.

IMG_0775

IMG_0777

IMG_0778

Step 17. Whip finish and you have a completed fly.

IMG_0782

IMG_0780

Enjoy, but first some proof of concept.

IMGP8095

IMGP8108

IMGP8120