Archive

Fly Tying

Last month Blake showed us how to tie up the Chubby Chernobyl, this month he gives us a good fly to hang off the back of that big honkin’ floater. Just in time for the season opener in Georgia I might add. A pheasant tail by itself is one of those flies that works on any trout stream in the world. Adding CDC to it is like putting ice cream on apple pie – it just makes sense.

Materials:

–          Bead to fit hook

–          Lead

–          Pheasant tail fibers

–          Flash

–          Wire

–          Peacock

–          CDC

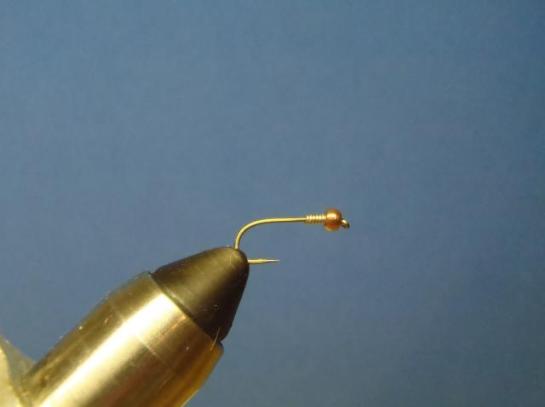
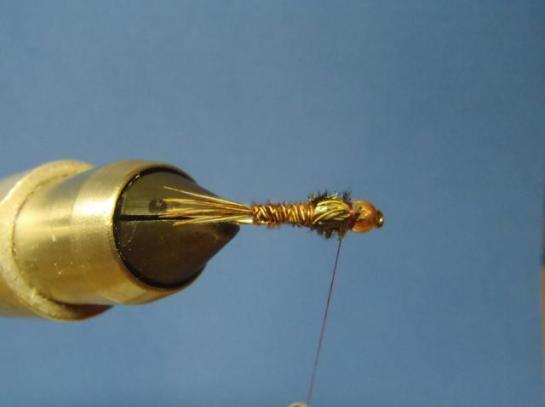
1. I like to use a 2x long nymph hook when using beads to account for the bead. Choose the size bead you want and slide it on to the hook. I also like to put some lead on the shank to keep the bead in place and add a little weight to get the fly down to where the fish are. The more weight that I have in the fly (while still making it look normal), the less shot that I have to add to the line.

P32700791

2. Cover the shank with thread. Make sure that you have a nice taper.

P32700801

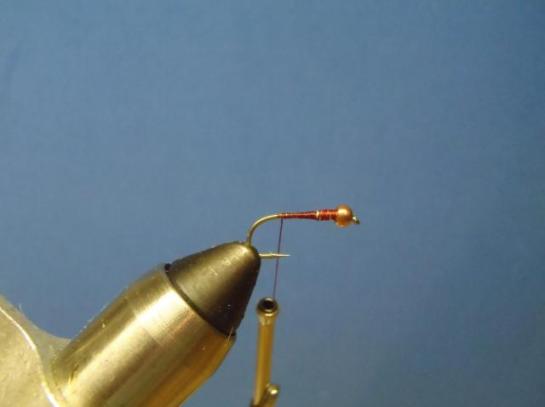
3. Tie in the pheasant tail fibers. I like to use a few extra fibers for a thicker tail.

P32700811

4. Tie in the wire rib. I used a copper bead and copper rib also

P32700821

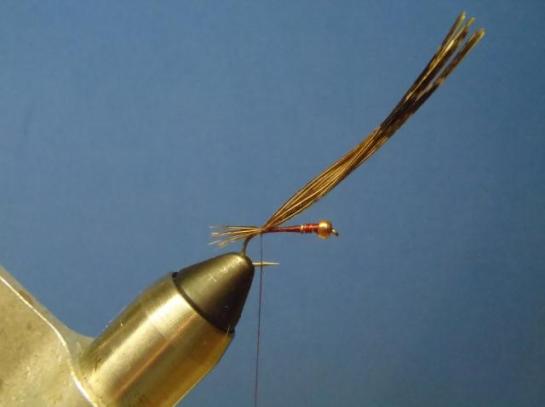
5. Wrap pheasant tail 2/3 of the shank length. I wrap the pheasant tail the opposite direction that I normally wrap materials so that the rib will be counter wrapped.

P32700831

6. Counter wrap the rib.

P32700851

7. Tie in a few pieces of krystal flash.

P32700861

  1. Then tie in some pheasant tail fibers.

P32700871

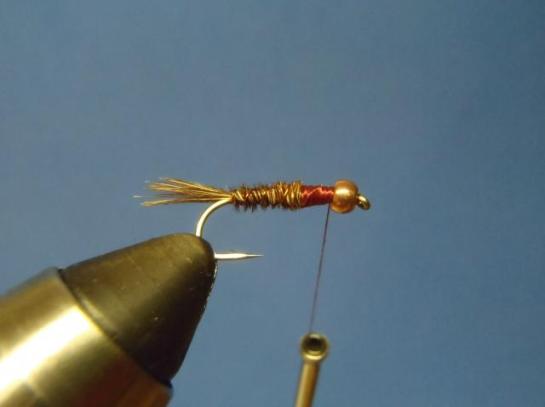
  1. Tie in peacock and palmer to the back of the bead.

P32700881

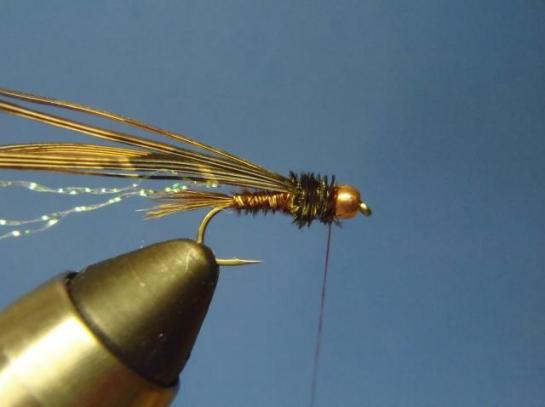
10. Pull over the pheasant tail and tie in. Then pull over the flash and tie in. The flash is subtle, but it’s there.

P32700891

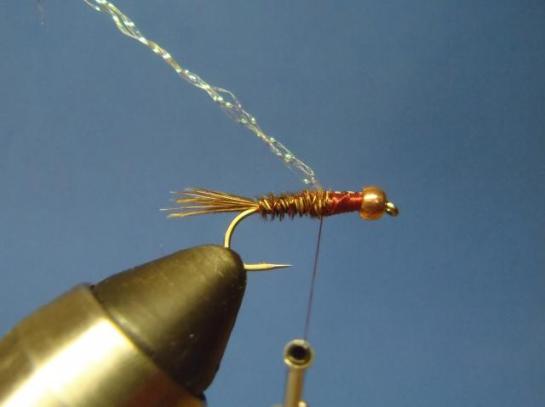
11. Last step is to make a loop, add just enough CDC fibers to make one full wrap around the fly. I don’t like a giant amount of CDC on there, just enough to give the hint of legs. Tie in loop and whip finish your thread.

P32700901

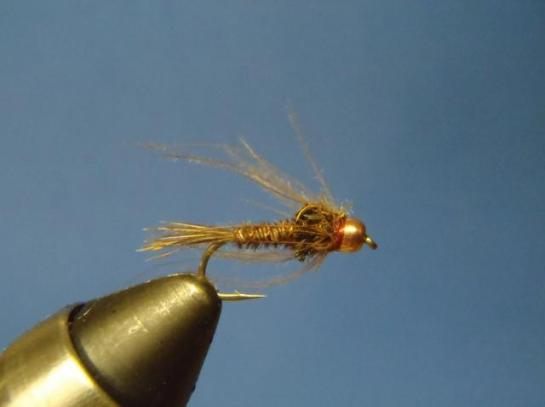
Finished fly, enjoy!


February’s fly of the month (better late than never) is the Chubby Chernobyl. This is the fly we use when we want to float multiple nymph rigs with a lot of weight. When available I prefer it over a thingamabobber because it has killer buoyancy and there is nothing more badass than when a fish takes a swipe at this fly.

Materials:

–          Flash

–          Dubbing

–          3mm foam

–          Wing material

–          Legs

Step 1. Insert hook in vise. I used a size 8 streamer hook. Wrap down a good thread base. I hit the thread with some super glue to lock it down.

P2270038

Step 2. Tie in some flash at the back of the hook and cut it to be hook gap long.

P2270039

Step 3. Dub the shank until you are even with the point of the hook.

P2270040

Step 4. Cut a strip of 3mm foam the width of the hook gap. Trim the corners. I use 3mm foam on size 8 and larger and 2mm foam on anything smaller. This fly is all about floating, especially when dropping multiple nymphs off the back of it. Tie in the foam above the hook point extending to half the length of your flash.

P2270041

P2270042

Step 5. Tie in a wing on top. I used the material that comes in the middle of mylar tubing. Any hydrophobic, crinkly fiber will do though.

P2270043

Step 6. Add a leg to either side.

P2270044

Step 7. Dub a few wraps around the wing/leg tie in, then continue dubbing up the shank until about one eye-length behind the eye

P2270045

Step 8. Tie down the foam and repeat steps 5 – 7. Whip finish thread between the eye and the foam.

P2270047

P2270051

P2270052

Step 9. Trim foam over the eye to your desired length. Trim corners as you did the other side.

P2270053

Step 10. Trim wing and legs to desired length and you have a finished fly. The wing on this fly, coated with some floatant, will float like a cork all day.

P2270054

P2270055

P2270056

A pair of Colorado River browns that fell to the fly.

IMG_0244

A Georgia rainbow that couldn’t resist either.

IMG_1545

IMG_1546