Archive

Fly Tying

Hard to believe it has been almost five years since Blake caught his state record spotted bass.  It’s also hard to believe that back then redfish weren’t our primary focus, it was spotted bass.  We were intent on breaking a record we thought was very attainable – the state record spotted bass on the fly.  Don’t call us record hunters though as it took 2.5 years for one of us to finally land one over 2 lbs, Blake came through and landed two in one day.  I’ve still yet to catch one over 2 lbs on the fly rod.  Shoot, it’s a good day when you catch one over 1 lb!  Thinking about his record and after a short conversation I had with Mike Tringali about the Choctaw bass earlier this week, my interest in our local spotted bass has been restored.  I had to go back to the old Riverbassin’ forum where we relayed our trip reports to each other and read about Blake’s day again.  I think it is worth a share here(I updated links and edited for spelling and grammar from the original):

08-18-2009

Well, August 14th was a good day that was about two casts from being one of the most frustrating days that I have ever had fishing. I had put in a few extra hours at work during the week and decided to take off to the stream, arriving around 2:30 in the afternoon. I started fishing and was doing pretty well on a crease fly catching above average fish in both size and number. I waded all the way to where I normally turn around and decided that I would just go one more bend in the stream just to check out what things looked like. Well, when I got around the bend I saw a deep pool that I figured would hold some nice fish. I was pretty surprised at what was about to happen. First, a little background about the stream, the average fish that we normally catch on the stream is around 9 – 10 oz and maybe 8 – 9 inches (maybe a little smaller). This day, I was getting bites from (not always catching) spotted bass that were ranging anywhere from 3/4 to 1 1/4 pounds on a consistent basis.

Anyway, I started casting in the last deep pool that I was going to fish and caught a pretty nice fish on my first cast.

OLYMPUS DIGITAL CAMERA

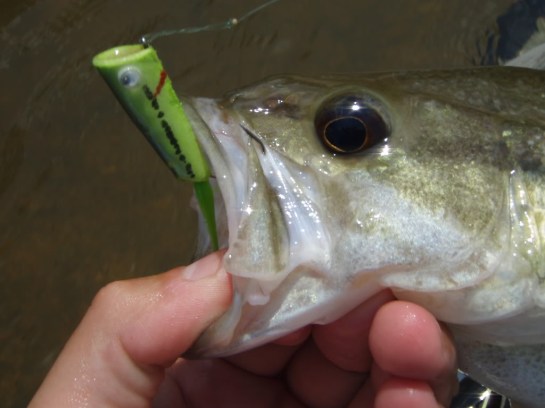
On the next cast, I caught a fish that I believe would have surpassed the Louisiana state record spotted bass on a fly rod. So now I have a decision to make. I didn’t have my scale or a stringer and I was 1.75 miles away from my truck and would have to carry the fish all the way back. I decided to just bite the bullet and let the fish go, hoping that I catch it again in the future. This fish far surpassed any fish that I have caught in this stream in the past 2.5 years. Below is the picture that I snapped using the timer feature on my camera before I let it swim…

OLYMPUS DIGITAL CAMERA

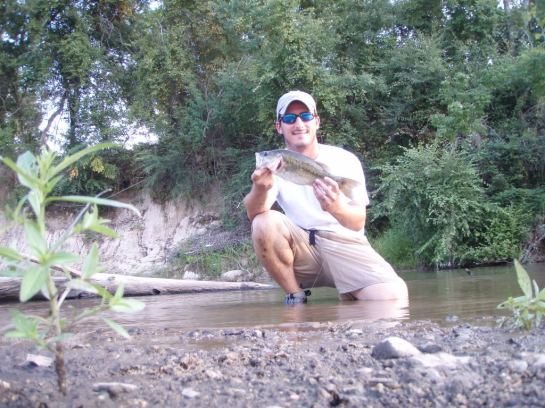
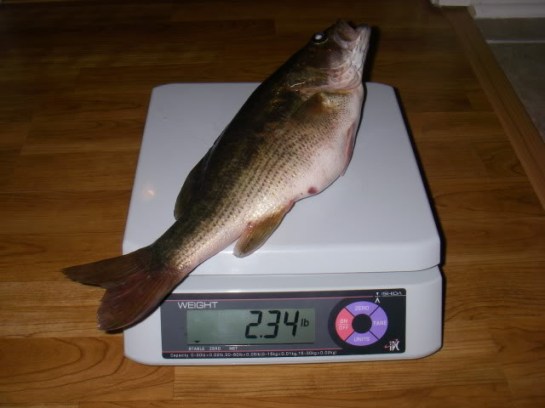
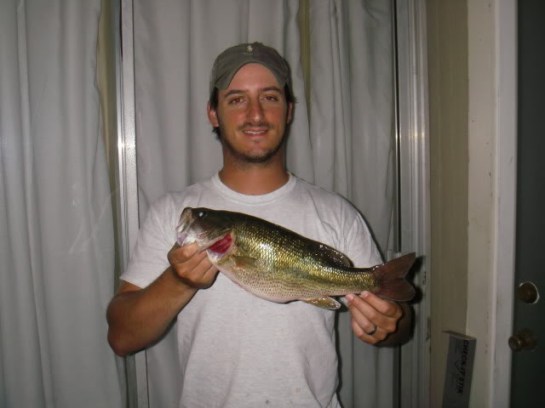
After this, I was pretty p.o.’d about not being prepared to catch a fish like this, this far away from the truck. So to pass some of the time on the walk back, I called Ben and told him that I thought I had just released the state record (he and I have been saying that we were gonna break the record and I even said that I would when I introduced myself on a thread on this site). Well, I get pretty close to my truck and it’s still daylight, so I figured I would fish a stretch that I didn’t have much luck at earlier in the day but Ben had caught a good one at on a previous trip. On my second cast I had a huge bite and set the hook. I thought I was caught on a log. Then the fish ran and I realized that I had a fish that was fighting harder than the one that I had released. I ended up landing the fish and in the end, It weighed 2.34 lbs and should be the state record. I’m still getting all the needed info together to send it in. Thought it was a cool story and figured I would share.

IMGP3113IMGP3114IMGP3119

08-19-2009

I had the fish weighed on a certified scale witnessed by two others (my wife and Ben), identified by a biologist other than myself, and signed off on by myself. The only thing that I have left to do is print out the pictures and send in the paper work with a 25 dollar check. I also have to send in the fly and leader that I caught the fish with.

I had the fish analyzed at work. Turns out that it was between 5 and 6 yrs old. The upper limit for spotted bass in the area is 7 years old. The fish had a 5 inch longear in it’s gut that helped push it over the edge on the scales.

I got to talking with some of the biologists that are doing spotted bass profiles in the watershed and have been included in the “collection” of fish from the streams that I fish. Looking forward to the next sampling day for sure

10-12-2009

http://laoutdoorwriters.com/louisiana-fish-and-big-game-records/louisiana-fish-records/

Congratulations to Blake on officially making the record books. Scroll down to page 33 – Fly Fishing division, spotted bass.

10-20-2009

Here it is:

OLYMPUS DIGITAL CAMERA

But I’m sure that it will be broken soon with Ben, Barret and I all really getting into the river fly fishing and spotted bass thing. Especially with the kayaks, it opens up a lot more and bigger water to fish. If it wasn’t $25 and I didn’t have to give up my fly and leader, I would fill up that list just to see my name on it nine times.

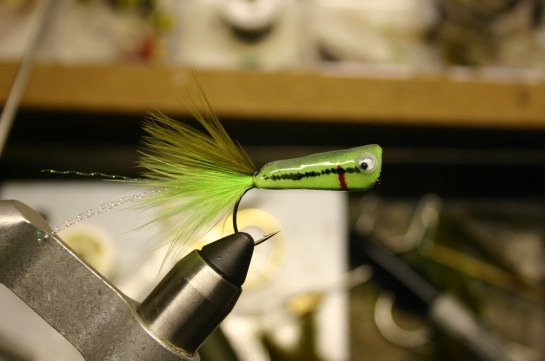
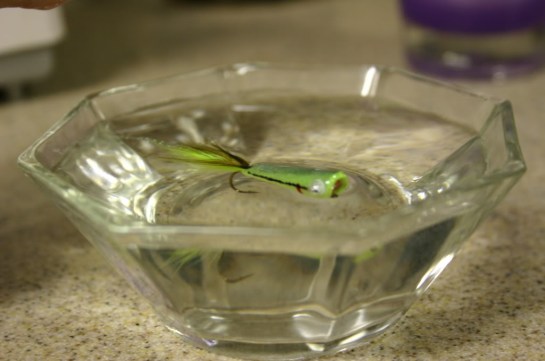
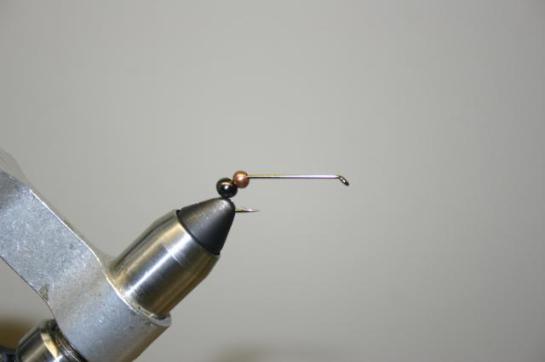
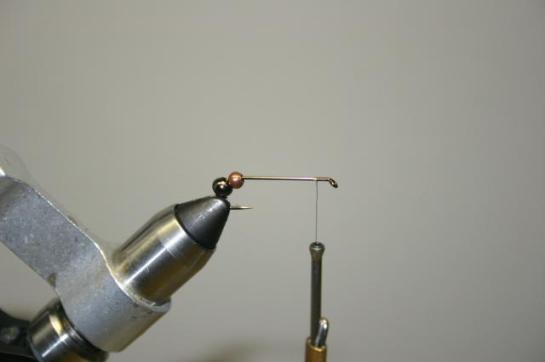
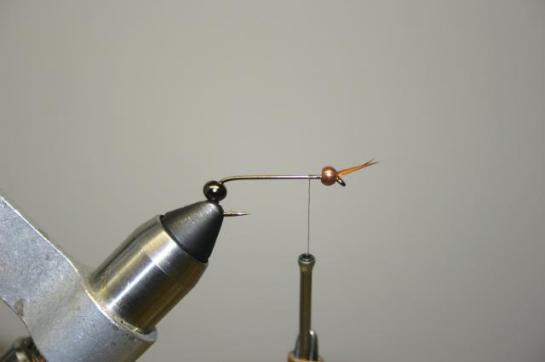
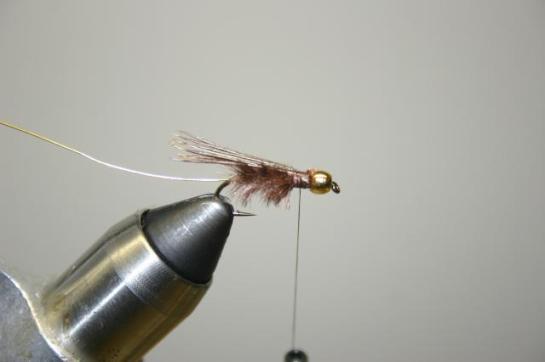
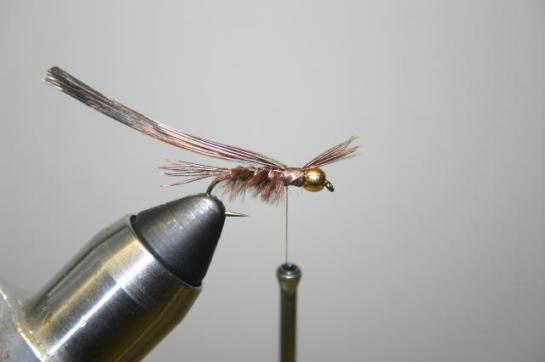
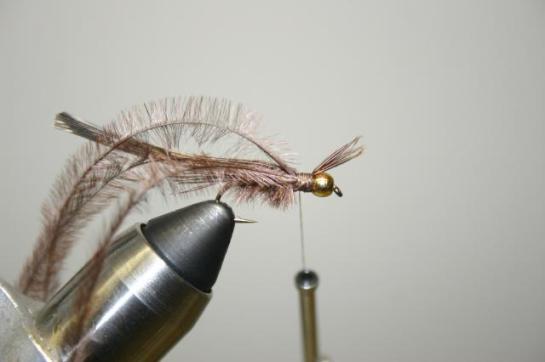
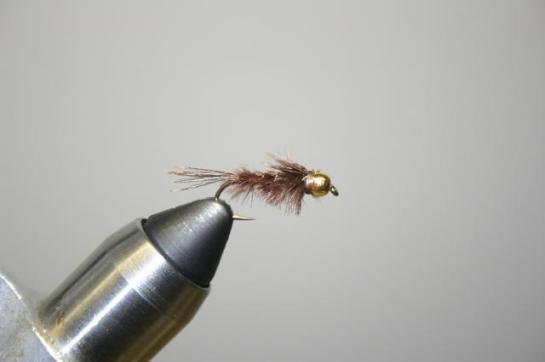
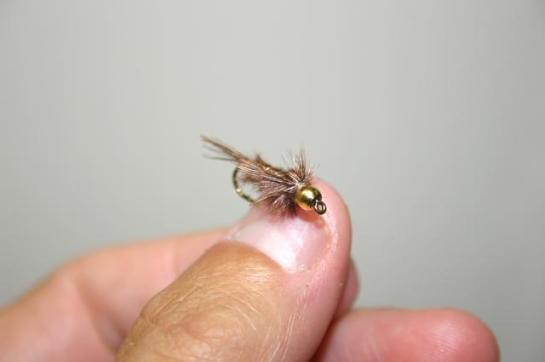
Blake had an incredible day that day and we followed it up a few days later with another great day.  No 2 lb bass were brought to hand then, but several 1+ lb bass were.  Most were caught on his crease fly which I’m going to go ahead and post that below as it is still an awesome fly to use for spotted bass.  He has also done an articulated version that you can find in the Fly archive, but this is the original, and Blake’s first SBS(Again, I took the liberty of editing the original for spelling and grammar).

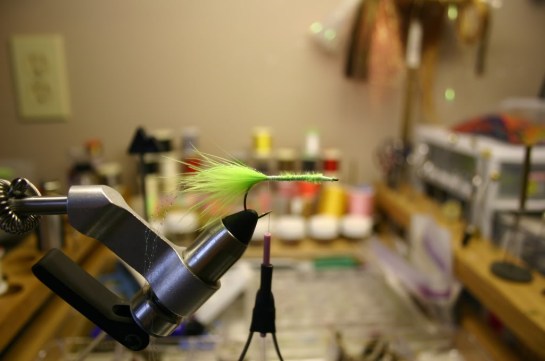
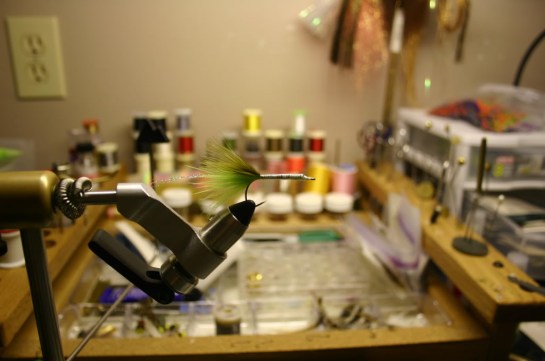
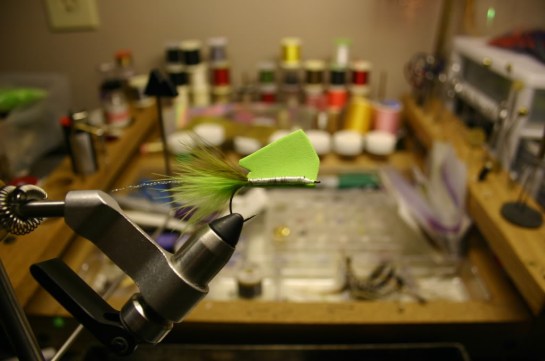
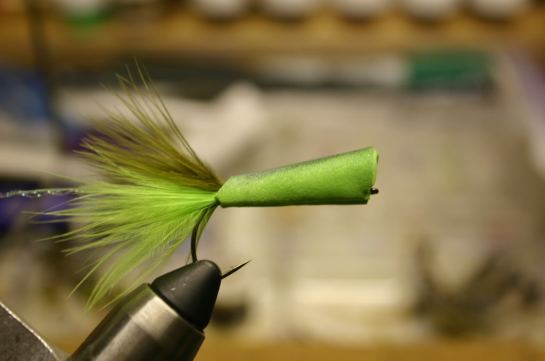
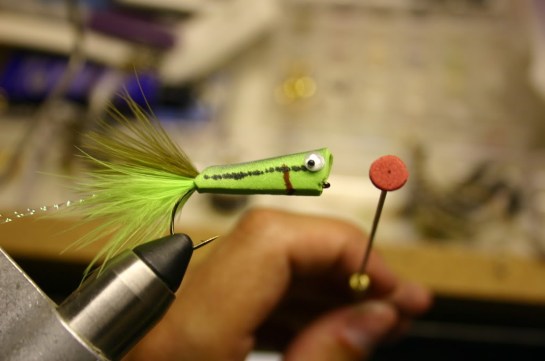
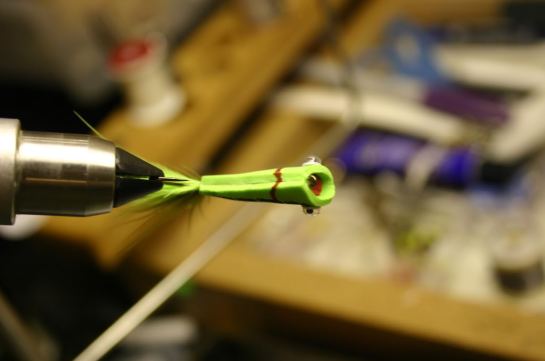
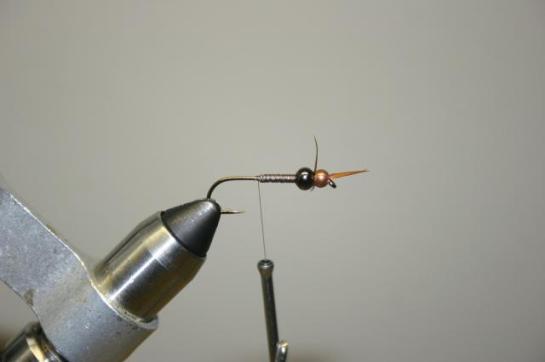
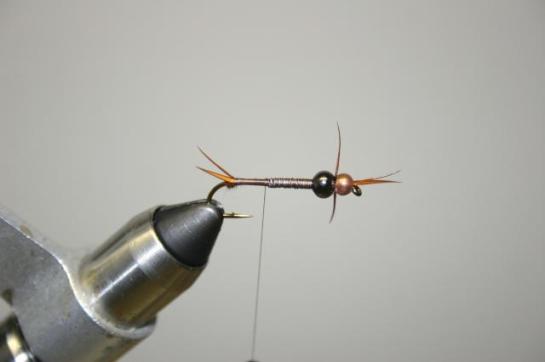
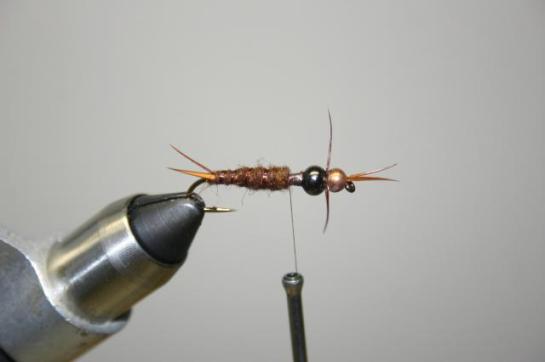
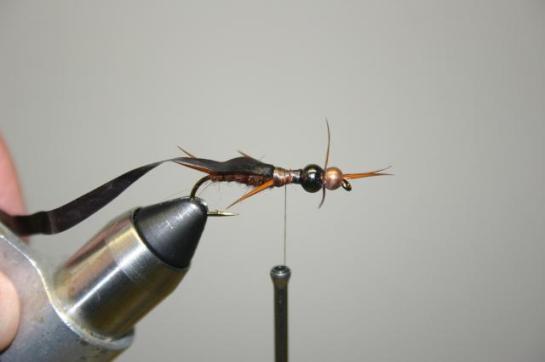
Chartreuse baby bass crease fly SBS

Well here goes, my first step by step:

Materials

  • Hook – Size 2 Orvis Bass Bug, Item No. 8810.
  • Tail – Chartreuse and Olive marabou, crystal flash
  • Thread – Danvilles 3/0 waxed monocord
  • Body – 2mm closed cell craft foam
  • Coloring – black and red permanent markers, Roseart metallic marker
  • Googly eyes
  • 5 minute epoxy
  • Superglue
IMG_1242
The first step is to tie in the chartreuse marabou tail and the crystal flash on top of that.
IMG_1247
Next, tie in the olive marabou. I try to wrap the marabou all the way down the shank with thread so that I have something with a little bulk to glue the foam to. Cut the flash to about an inch behind the marabou tips. I leave it a little long as it can always be cut down later on.
IMG_1248
Next would be to cut out the piece of foam using a template. I messed around with different shapes until I found a shape that suited most of my crease flies and then made the template out of card stock.
IMG_1246
Color the foam. The metallic markers don’t dry right away, so I make a pretty heavy line and smear it with my finger to get the faded look from top to bottom. I find it easier to draw the lateral line and add eyes after the fly is glued, but it doesn’t really matter if you do it now or wait until after.
IMG_1254
I glue one side of the foam to the shank leaving enough under the shank so that when I glue the other side of the foam, the ends of the foam are glued together so that the shank doesn’t show through the crack.
IMG_1255
Then glue the other side.
IMG_1258
I then draw the lateral line and add the eyes and the gills(I use both googly eyes and stick-on eyes).
IMG_1259
I cut a hole(using a hole punch) from some red foam and insert it in the end of the fly using my bodkin. I use super glue to secure it in place. The second picture shows the closed ends of the foam on the bottom of the shank and also the red plug in the mouth of the popper.
IMG_1260
IMG_1261
The white baby bass is another good pattern. For it, I would substitute white marabou for the chartreuse marabou. I also colored the mouth part red on this fly. No reason why, just thought it looked good.
IMG_1264
I then add a light coat of 5 minute epoxy for durability – finished fly.
IMG_1262
IMG_1266
Proof of concept…
OLYMPUS DIGITAL CAMERA
IMGP3116

June’s fly of the month is another of Blake’s ties that managed to fool fish at the cabin – the VBF(very big fish) Stone.  I had been relaying any intel I could gather from the creek throughout the Spring to Blake and after hearing about Jim’s run in with a VBF of his own and viewing Dan’s stonefly nymph video, Blake set out to tie something similar that might work to catch these trout.  It has enough weight in it to eliminate the need for extra shot and is more natural looking than a pickle, which should hopefully fool those wise, old trout who know better.

Materials

  • Streamer hook, 4x long
  • Bead – gold to fit the hook and black one size larger
  • Goose biots
  • Dubbing
  • Vinyl ribbing
  • Shell back
  • Thread – I use smaller thread than I normally would just to reduce bulk under the beads

1. Slide beads on the hook, gold bead on normal, and black bead reversed with the concave side facing forward. Start thread behind the hook eye.

IMG_2267

IMG_2268

2. Tie in two biots extending over the hook eye. Be careful to not wrap so much thread that you can’t get the bead butted up against the eye. Trim butts, whip finish, add some super glue to the thread then push the bead up.

IMG_2269

IMG_2270

3. Start thread behind the first bead and tie in a biot on either side. I like my legs to be about half the shank length. I like to use enough thread so that the bead is snug when I slide it up the shank. Whip finish, super glue, the slide up the bead.

IMG_2271

IMG_2272

IMG_2273

4. Wrap lead on the shank. Start thread behind the lead and wrap the lead with a layer of thread.

IMG_2274

5. Wrap a small ball of dubbing right before the hook bend. This will help to splay out the tails.

IMG_2275

6. Tie in two biots at the bend.

IMG_2276

7. Tie in ribbing material at the far side of the shank

IMG_2278

8. Dub the body

IMG_2279

9. Palmer the rib and tie off in the space behind the bead.

IMG_2280

10. Tie in shell back material.

IMG_2281

11. Biot on either side.

IMG_2282

12. Dub leaving a small space behind the bead to tie in the next set of legs. Bring shell back over and tie it in.

IMG_2283

IMG_2284

13. Tie in next pair of legs then dub the body up to the bead. Whip finish behind the black bead.

IMG_2285

IMG_2286

14. Start the thread between the front legs and the gold bead. Add some dubbing here to make those front legs angle towards the back of the fly.

IMG_2287

IMG_2288

15. Bring shell back over the bead and tie in right behind the gold bead. Cut the extra shell back and whip finish.

IMG_2289

IMG_2290

IMG_2292

I like to give the shell back a coating of SHAN to make it shiny. Finished Fly. Enjoy

IMG_2293

This eager trout took the VBF stone not more than 30 minutes after I caught it on a dry.

IMG_2446

We’re a little late with May’s fly of the month, but it’s by design.  We’re continuing to feature flies that have worked for us on the trout at the cabin, though prior to this month they were all from last year’s trip.  I’m fairly certain they will work for trout elsewhere and probably other fish too.  The first one will be a beadheaded version of the featherduster nymph which was first tied by Wally Eagle out in West Yellowstone.  As you’ve probably guessed the original pattern was tied from a feather duster.  The sizes that were effective in North Georgia were 14 and 16, but this one is tied in a size 12 for purposes of picture clarity.

Materials:

  • 2x long nymph hook(I prefer 2x long hooks when using a bead and regular hooks without a bead)
  • Bead to fit hook
  • Lead wire
  • Gold wire
  • Ostrich herl
  • Pheasant tail
  • Thread

1. Put bead on hook and slide to the eye.

IMG_2248

2. Wrap lead onto the shank and butt it up against the bead. I put enough lead on there to take up the space where my thorax will be.

IMG_2249

3. Cover lead with thread and create a smooth underbody.

IMG_2251

4. Tie in a wire rib on the far side of the hook. I tie it in on the far side so that the first half wrap goes under the hook.

IMG_2252

5. Tie in two peacock herls at the bend and bring thread to the area at the start of the thorax. Twist herls together and palmer. I try not to make this very dense.

IMG_2253

IMG_2254

6. Measure some pheasant tail fibers for length and tie them in at the thorax. I like my tails to be roughly half the length of the hook shank.

IMG_2255

7. Use the wire rib to tie down the pheasant tail.

IMG_2256

8. Tie in a few more pheasant tail fibers with the tips pointing over the eye. These will be the legs, so they should also be roughly half the length of the hook shank. The butt ends of the fibers will become the wing casing.

IMG_2257

9. Tie in a few more herls, twist together, and palmer. You could twist these with the thread to reinforce the herl if you want. I like to make the thorax area a little more dense than the abdomen.

IMG_2258

IMG_2259

10. Separate the pheasant tips, pull the butts over to form the wing case, and tie them in dividing the tips.

IMG_2260

11. Cut off the butts and whip finish.

IMG_2261

IMG_2262

IMG_2263

Finished fly, enjoy!

IMG_2264

This kype jawed rainbow fell for the beadhead featherduster nymph.

IMG_2448