Archive

Fly Tying

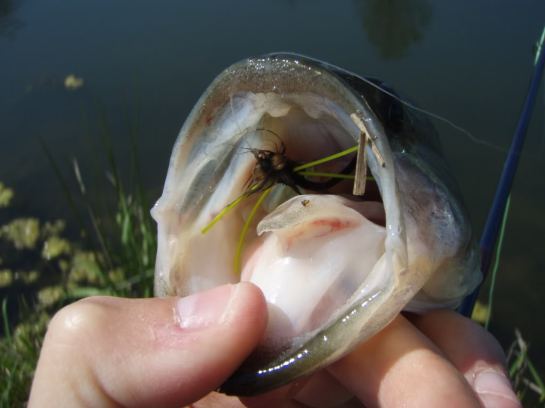
This month, Blake served up a pattern that we plan to throw at some trout in Georgia. Attractor patterns are our go-to on those bluelines that hold wild trout and the Madam X fits the bill. Though I think the Madam X is quite at home on the local bluegill pond as well. It’s a versatile pattern that deserves a home in anyone’s fly box. Here is Blake’s version:

Materials

– Hook: curved shank, I used a size 12 for the wild Georgia trout.

– Thread: color to match body

– Tail: Elk body hair

– Dubbing: Spectrablend dry fly dubbing. Match the hatch

– Underwing: Snowshoe hare’s foot, dun

– Collar/Head: Elk body hair

Step 1. Clamp hook in vise and start thread at a point behind the eye where you would like to tie down your bullet head. This will be where my body will stop and my head will begin.

OLYMPUS DIGITAL CAMERA

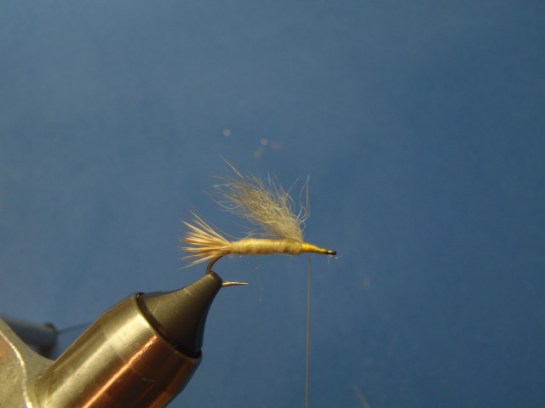
Step 2. Cut a clump of elk hair and measure it to half the thorax length and tie it in. Wrap the butts down to the index point.

OLYMPUS DIGITAL CAMERA

Step 3. Bring thread towards the bend to where the tail is tied in and dub a body forward to the index point. I used dry fly dubbing to match light cahills for this one, but I also use other dubbings as well. Try to match whatever insects the fish are eating. Being that this is a bushy attractor fly, you can get away with some less natural colors also.

OLYMPUS DIGITAL CAMERA

Step 4. The actual pattern didn’t call for an under wing, but I thought it would be better with one. I used a small about of snowshoe rabbit foot hair.

OLYMPUS DIGITAL CAMERA

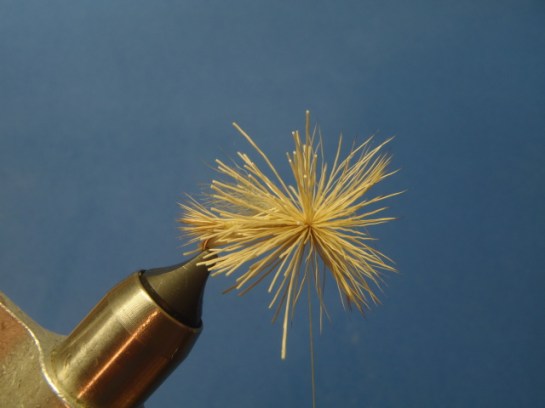
Step 5. Cut a larger clump of elk for the head. The amount will vary with hook size. I measure it to be the total length of the hook. Spin it right behind the eye of the hook. The hair in the image is a little shorter than I would have liked, but the fish won’t care.

OLYMPUS DIGITAL CAMERA

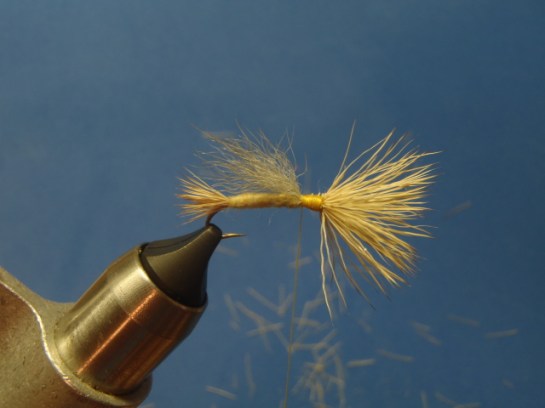
Step  6. Once spun, cut off the butts and clean up the area between the elk tips and the under wing.

OLYMPUS DIGITAL CAMERA

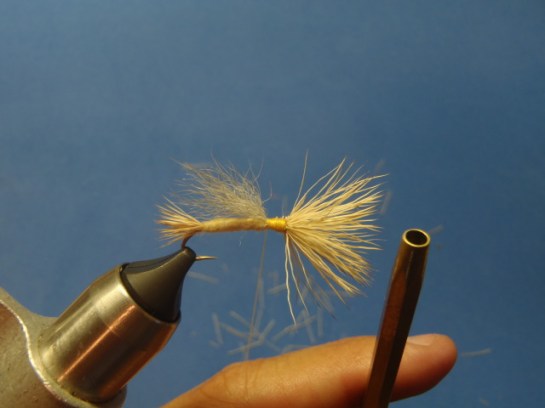
Step 7. The original kit that I bought had these brass tubes in it that I assume are to be used to aid in making half hitches. I use the biggest one as a bullet head tool. Bring the thread to a point where you want to tie down the head, and push the tool over the eye of the hook forcing all the elk hair tips back. I then make a few wraps with the thread to cinch down the hair and make it flare. Remove the tool.

OLYMPUS DIGITAL CAMERA

OLYMPUS DIGITAL CAMERA

OLYMPUS DIGITAL CAMERA

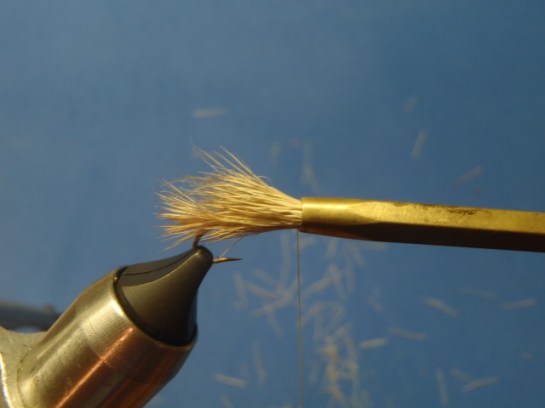
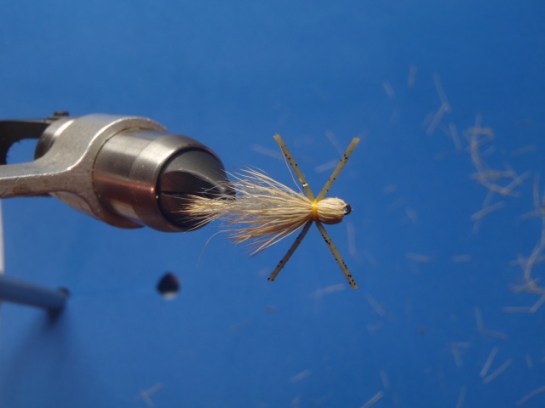
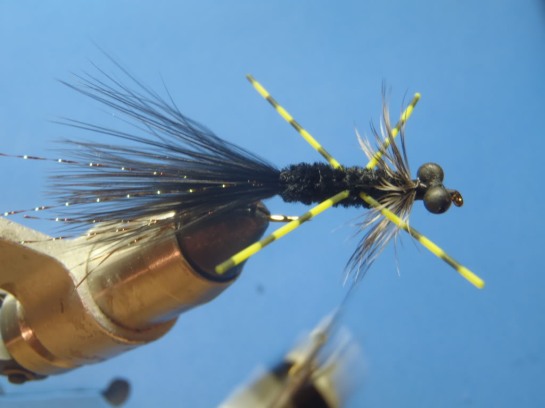
Step 8. Tie in rubber legs on either side of the fly in the same spot where you tied in the head.

OLYMPUS DIGITAL CAMERA

Step 9. Whip finish the thread in between the rubber legs and turn the fly over in the vice. The last step is to trim the bottom of the collar to expose the dubbed body.
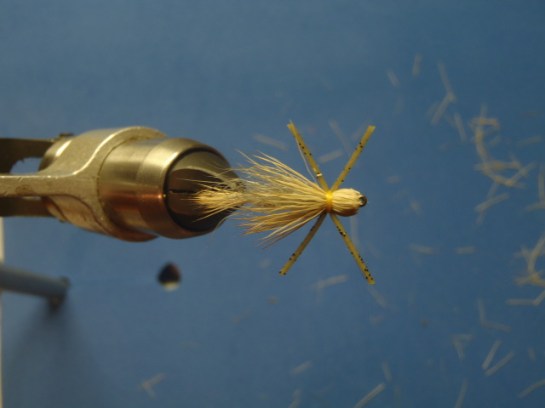
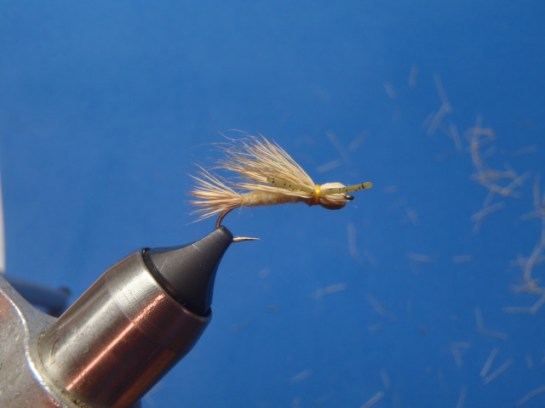
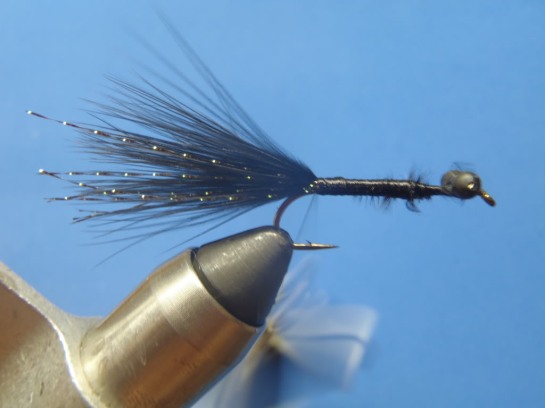
OLYMPUS DIGITAL CAMERA

OLYMPUS DIGITAL CAMERA

Completed fly.

OLYMPUS DIGITAL CAMERA

OLYMPUS DIGITAL CAMERA

OLYMPUS DIGITAL CAMERA

A little late for April’s fly tying segment, but I don’t think anyone will mind. Blake did a step by step on the fly that I had success with back in early April. I had no idea what it was called then, but we found out it’s true name and that it was originally tied by Johnny Miller and is available through Umpqua. This is Blake’s version. It is a killer fly for redfish.

Materials:

–          Mustad 34007 Size 2

–          Raccoon Tail

–          Saddle Hackle

–          Gold Mylar Tubing, Small

–          Dumbbell Eyes

Step 1. Start thread and put down a good base from the eye to somewhere near above the barb. I like to put a layer of super glue on the thread wraps for some extra security.

OLYMPUS DIGITAL CAMERA

Step 2. Cut a clump of raccoon fur and tie it in for the tail. Comb out some of the under fur so that there isn’t too much material on the hook shank. Any tailing material would work.

OLYMPUS DIGITAL CAMERA

Step 3. Tie in a saddle hackle by the tip and palmer it in close touching turns up the shank. Try to get the feather to lay back towards the tail by pulling the barbs back before each wrap. Tie down the stem and tidy up the shank. I like to wrap all the materials to a spot right behind where my dumbbell eyes will be tied in.

OLYMPUS DIGITAL CAMERA

Step 4. Bring thread right in front of the hackle and tie in the first section of gold tubing. The tubing I used comes with a synthetic core that needs to be removed before tying it in. I cut sections of tubing about 3/4” long for this fly. The length of the tubing sections depends on the shape that you want to trim them. I like to minimize the amount of waste. Repeat this step 3 more times. (or more, all depends on how long you want your body). Make sure to tie it in using figure eight wraps.

OLYMPUS DIGITAL CAMERA

OLYMPUS DIGITAL CAMERA

OLYMPUS DIGITAL CAMERA

OLYMPUS DIGITAL CAMERA

Step 5. Tie in dumbbell eyes in front of the tubing. Hopefully, there is enough room left over to tie in a week guard if you want one.

OLYMPUS DIGITAL CAMERA

Step 6. Tie in a weed guard if you want one. Whip finish and part off the thread.

OLYMPUS DIGITAL CAMERA

Step 7. Trim the tubing on either side to whatever shape you want then tease out the braid of the tubing. I like to do either an oval or on an angle from front to back.

Before:

OLYMPUS DIGITAL CAMERA

After:

OLYMPUS DIGITAL CAMERA

I like to cover all the exposed thread with a good coating of hard as nails to protect it from teeth. Makes for a more durable fly. Enjoy.

OLYMPUS DIGITAL CAMERA

OLYMPUS DIGITAL CAMERA

OLYMPUS DIGITAL CAMERA

Deadly on any warmwater fish, here is Blake’s version of the original Carter Nelson fly, which you can find here – http://www.flyfishga.com/rl_dragon.htm

Materials:

Hook: 4x long streamer

Tail: Marabou and flash

Body: chenille

Legs: Sililegs

Weight: Bead chain

Dubbing: Black ice dubbing

Step 1. Start thread and tie in bead chain eyes using figure 8 wraps.

OLYMPUS DIGITAL CAMERA

Step 2. Bring thread to a point above the barb. Tie in marabou for the tail and tidy up the butt ends around the hook. I like to tie it down up the shank to about one eye length behind the bead chain eyes.

OLYMPUS DIGITAL CAMERA

Step 3. Tie in flash along either side of the marabou.

OLYMPUS DIGITAL CAMERA

Step 4. Tie in your choice of chenille material.

OLYMPUS DIGITAL CAMERA

Step 5. Bring thread to the midpoint between the eyes and tail tie in. Tie in sililegs on either side of the hook.

OLYMPUS DIGITAL CAMERA

Step 6. I find it easier to use a piece of lead wire to hold the legs out of the way while I wrap the body. I then use my bodkin to pull the two rear legs out of the lead wrap. Take one wrap of chenille between the legs, and continue to a spot behind the bead chain leaving enough room to make a hackle collar.

OLYMPUS DIGITAL CAMERA

OLYMPUS DIGITAL CAMERA

OLYMPUS DIGITAL CAMERA

OLYMPUS DIGITAL CAMERA

Step 7. Tie in a feather for the collar. I use a soft webby grizzly feather. Wrap the feather to form a collar.

OLYMPUS DIGITAL CAMERA

Step 8. Split the thread and insert dubbing. Spin the thread to form a dubbing rope.

OLYMPUS DIGITAL CAMERA

OLYMPUS DIGITAL CAMERA

Step 9. Wrap the dubbing one full turn around the shank directly in front of the collar, then finish off the dubbing rope using figure 8’s around the bead chain.

OLYMPUS DIGITAL CAMERA

Step 10. Whip finish the thread. Finished fly.

OLYMPUS DIGITAL CAMERA

OLYMPUS DIGITAL CAMERA

OLYMPUS DIGITAL CAMERA

OLYMPUS DIGITAL CAMERA

Proof of concept

OLYMPUS DIGITAL CAMERA

OLYMPUS DIGITAL CAMERA

OLYMPUS DIGITAL CAMERA

OLYMPUS DIGITAL CAMERA

OLYMPUS DIGITAL CAMERA