Archive

Fly Tying

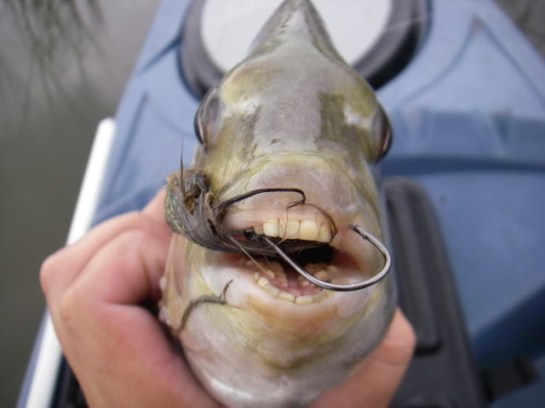
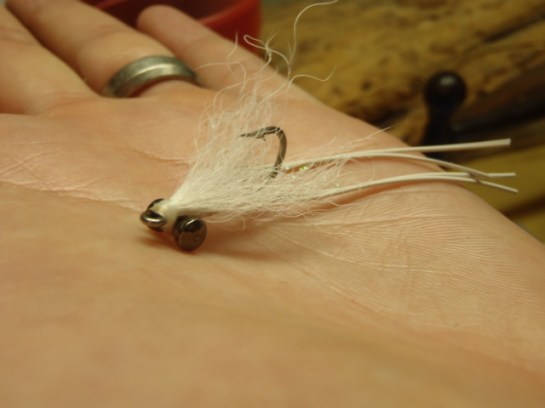
For August’s fly of the month, Blake shows us how to tie up the intruder pattern that I caught a few fish on last time out in the marsh. Supposedly, having an articulating point lessens the leverage that a fish normally has using long shanked hooks, thus the experiment with an intruder fly in the marsh. It caught a few different species too, including the normally tough to hook sheepshead, so it may have it’s place in the inshore fly box.

Materials:

-Hook – size 1 octupus hook tied using 65# braid to a long shank eagle claw hook (make this one a cheap -hook as it will be cut off directly behind the fly)

-Estaz chenille

-Brown feather from a pheasant

-Brown craft fur

-Gold body braid

-Black ostrich herl (or something like it)

-Ice dubbing

-Dumbbell eyes

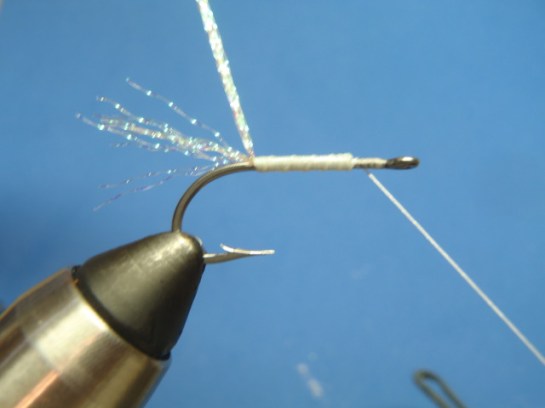
1. Mount front hook in vise. Using your choice of string, tie in the back hook onto the shank of the front hook. Wrap the string down all the way to the eye of the front hook. Insert the string tags through the eye, then wrap them back towards the bend. The fold through the eye just adds a little strength to the connection.

OLYMPUS DIGITAL CAMERA

OLYMPUS DIGITAL CAMERA

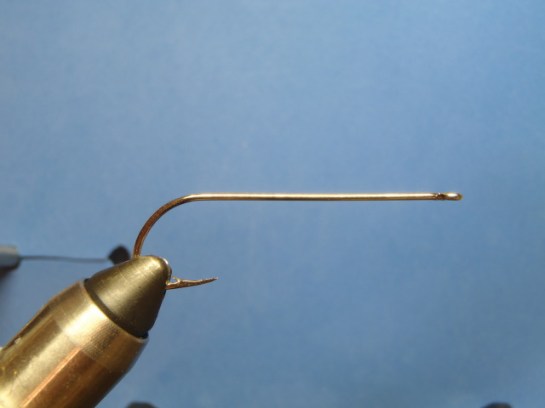
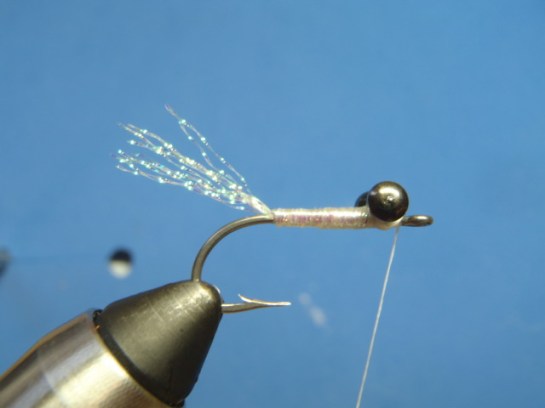
2. Tie in dumbbell eyes about one eye length back. Here, I run a line of superglue on the eye tie in and down the shank of the hook to further strengthen the back hook connection.

OLYMPUS DIGITAL CAMERA

3. Tie in the estaz and create a bump at the rear end of the fly. This helps keep the materials from collapsing. I also tie everything down all the way to the dumbbell eyes so that I don’t get a lumpy body.

OLYMPUS DIGITAL CAMERA

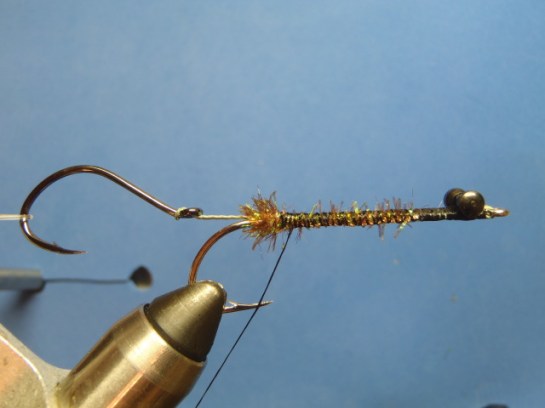
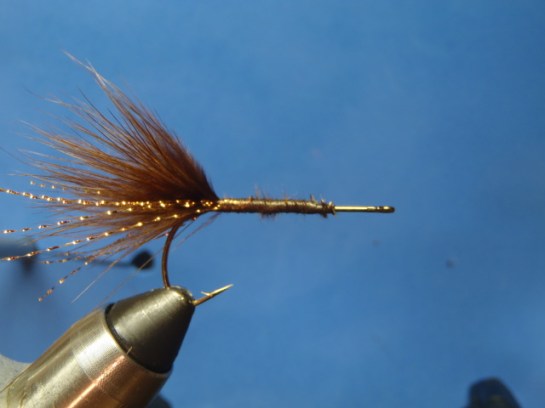
4. Tie in a brown feather off a pheasant skin. Any feather can be used here. I like this feather because it is soft enough to move in the water, but stiff enough not to collapse. Tie in by the tip, palmer, and tie off. Don’t cut the excess as we will tie it in along the shank to avoid a bump.

OLYMPUS DIGITAL CAMERA

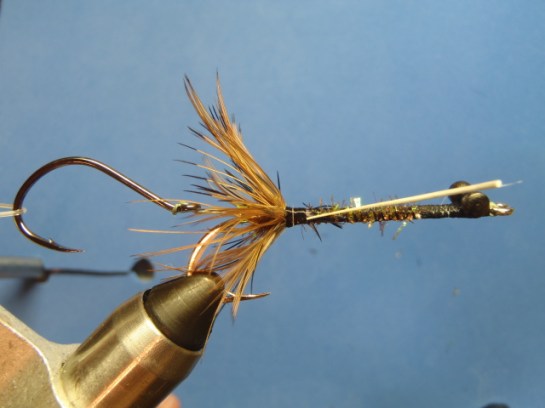
5. Using your favorite method (split thread, loop, brush …) spin up some craft fur and palmer it right in front, and up against the feather. I used the split thread method used here in these videos. http://www.theweeklyfly.com/TWF/tyer/marcpetitjean/ . I split the thread, insert the craft fur though the split while still attached to the backing, then cut off the backing, then spin as seen in the video.

OLYMPUS DIGITAL CAMERA

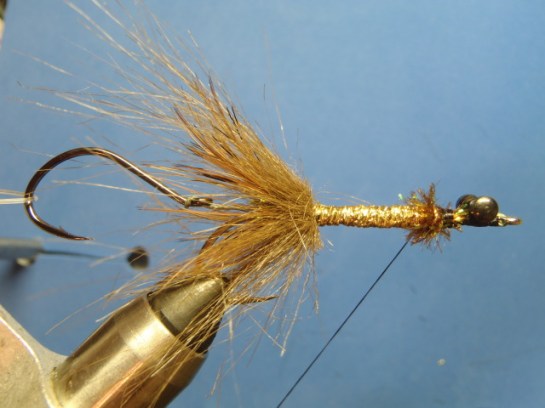
6. Tie in the body braid  and tidy up the hood shank by wrapping down all the extra materials.

OLYMPUS DIGITAL CAMERA

7. Lay down a layer of hard as nails, then wrap the body braid to a spot behind the dumbbells that will give you enough room to finish the head.

OLYMPUS DIGITAL CAMERA

8. Tie in estaz and create a bump. Tie off.

OLYMPUS DIGITAL CAMERA

9. Again, tie in a pheasant feather and palmer.

OLYMPUS DIGITAL CAMERA

10. Again, spin some craft fur in a loop of some sort and palmer.

OLYMPUS DIGITAL CAMERA

11. Next, spin some herl in a loop. I again use the method seen in the petitjean video. Wrap this right up against the craft fur.

OLYMPUS DIGITAL CAMERA

12. Next, dub the head. I tie a clump of dubbing behind the eyes on the bottom and top of the hook and then dub around the dumbbell eyes using figure 8 wraps. Part off thread.

OLYMPUS DIGITAL CAMERA

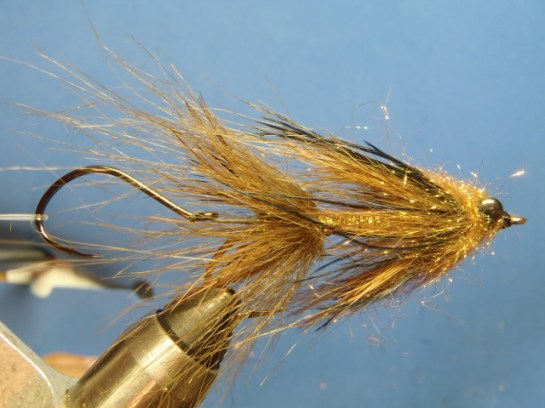
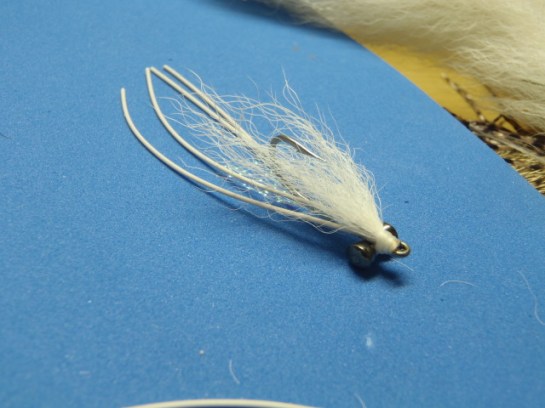
13. Cut off the front hook right at the rear of the fly. Finished Fly, so far it has caught reds, drum, and sheepshead.

OLYMPUS DIGITAL CAMERA

OLYMPUS DIGITAL CAMERA

IMGP7540

Fly of the month for July is a variant of Beck’s sili legs. It was a Beck’s sili legs that slayed the trout and ladyfish on July 4th. It probably wasn’t originally intended to catch Gulf Coast speckled trout, but proved effective on Independence Day. As with every fly of the month, this version was tied by Blake Leblanc.

Materials:

–          Hook: Mustad 34007, Size 4

–          Thread: 3/0 Monocord

–          Flash: Pearl Krystal Flash

–          Weight: Dumbbell Eyes

–          Wing: Calf Tail

–          Legs: Silicone skirt material

1. Start thread on the hook. Wrap a smooth base layer from behind the eye to above the barb. Tie in a few strands of flash and wrap them up to a point about one eye length behind the hook eye.

OLYMPUS DIGITAL CAMERA

2. Tie the flash back down the shank to the spot above the barb creating a smooth under body. This also creates a small bump near the eye of the hook that will aide in tying in the dumbbell eyes. Bring thread to the bump behind the eye

OLYMPUS DIGITAL CAMERA

3. Coat the shank with a layer of Hard as Nails and wrap the flash around the shank. Tie off at the bump. I will normally put a layer of hard as nails on top as well.

OLYMPUS DIGITAL CAMERA

4. Tie in the dumbbell eyes, using figure 8 wraps, pressed up against the bump made by the flash. I think this secures the eyes a little better. This should leave you with just enough room to tie in the wing and legs.

OLYMPUS DIGITAL CAMERA

5. Tie in the legs on one side first. Then fold them back to the other side and tie them in on the other side. I like to tie them in on top of the dumbbell eyes. I used the rubber material that I bought from here. http://www.jannsnetcraft.com/skirt-making-material/036620300008.aspx. It’s good for everything, but great for nothing.

OLYMPUS DIGITAL CAMERA

OLYMPUS DIGITAL CAMERA

6. Tie in an over wing of calf tail. I try to even the tips a little, but not so much that I lose the taper.

OLYMPUS DIGITAL CAMERA

7. Whip finish, coat with hard as nails. Finished Fly. Enjoy

OLYMPUS DIGITAL CAMERA

OLYMPUS DIGITAL CAMERA

Going international for this month’s FOTM. Here is a pattern that originated on the Bow River in Alberta, Canada, but has a found a home in many fly boxes across North America. The Bow River Bugger is the offspring of a woolly bugger and a muddler minnow. It was originally tied by Peter Chenier in the 80’s, this is Blake’s version of the fly.

Materials:

Hook: Bass Bug Stinger, Size 2 used

Thread: 6/0 brown and 50 denier gsp.

Tail: marabou with some flash

Body: uv dub, hackle, gold rib

Head: deer hair

1.  Start thread ¼ to 1/5 the length of the shank behind the eye of the hook. This will be our reference point to where our collar will be. I like to err on the side of a shorter head.

image

2.  Tie in marabou about the length of the shank. Wrap the butts all the way to the index point behind the hook eye. This makes for a more level, less lumpy body, especially at the point above the barb where a lot of material will be tied in.

OLYMPUS DIGITAL CAMERA

3.  Tie in a couple strands of flash on either side of the hook.

OLYMPUS DIGITAL CAMERA

4.  Tie in the gold ribbing and hackle by the tip leaving the tag ends of both extending to the index point. Wrap over the tag ends to make a smooth body.

OLYMPUS DIGITAL CAMERA

5.  Dub a body to the index point.

OLYMPUS DIGITAL CAMERA

6.  Palmer the hackle to the index point. I like a good many wraps of hackle, but it’s up to the tyer. Do whatever suits your situation.

OLYMPUS DIGITAL CAMERA

7.  Counter wrap the wire and tie it in at the index point. Be careful not to use too many wraps at the index point, don’t want it to be too bulky.

OLYMPUS DIGITAL CAMERA

8.  Here I whip finish my 6/0 brown thread and switch to 50 denier gsp to spin the deer hair head. Start the head by cutting a decent clump of deer hair and align the tips using a hair stacker. Once aligned, hold the bundle with the tips facing toward the back of the hook. Push the eye of the hook into the middle of the clump while holding the hair with your right hand. Once the tips reach the desired length of your collar, grip the hair with your left hand and make two loose wraps around the hair. Then pull the two wraps tight to flare the hair forming the collar. I like to keep the butts long so I know when I’m getting close to the collar when trimming.

OLYMPUS DIGITAL CAMERA

9.  Bring the tread to the front of the spun hair. I want a fairly loose head on this fly so I didn’t use a hair packer. Spin another clump of hair using the same process as before. I only use two bundles of hair on this fly, but if I want one that floats a little better, I will normally do 4 clumps of hair packed real tight.

OLYMPUS DIGITAL CAMERA

10.  Bring the thread directly behind the eye and whip finish the thread. Being that I am using white gsp, I used a permanent marker to color the thread to match the color of the fly. Trim the fly to the desired shape. I normally go for a bullet shaped head stopping at the hair tip collar. Finished fly, enjoy.

OLYMPUS DIGITAL CAMERA

UPDATE: Blake fished this fly on a local river last week. Just as suspected, it catches spotted bass.

OLYMPUS DIGITAL CAMERA

OLYMPUS DIGITAL CAMERA

OLYMPUS DIGITAL CAMERA