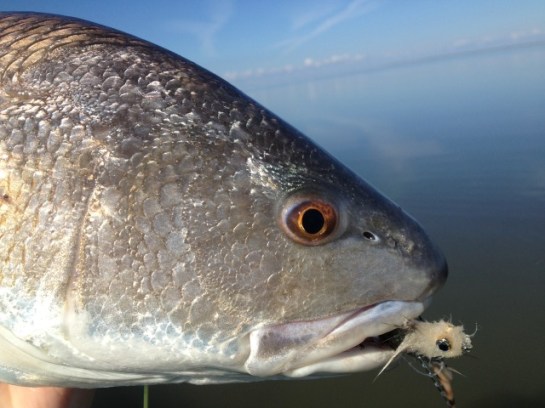
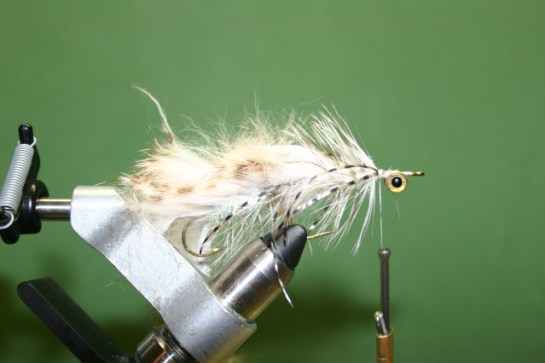
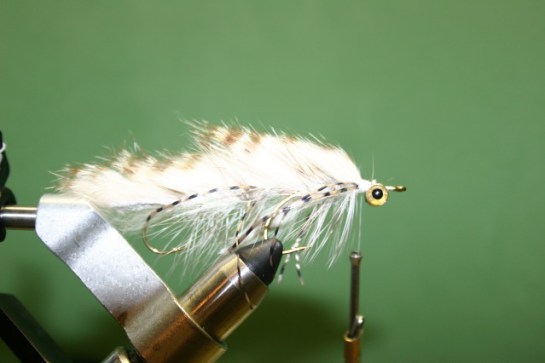
January’s fly of the month proved extremely effective last Saturday on big redfish and drum. It was something Blake whipped up after he asked me what he should tie for January and I told him to tie a “sex cougar”. I mixed up two of Kelly Galloup’s famous streamer flies, the “sex dungeon” and the “zoo cougar”, and the result was this. Tied with wool instead of deer hair, it has a good sink rate and is fairly easy to cast for it’s size.
Materials:
– Zonker strip
– Webby hackle
– Estaz chenille
– Ribbing
– Spanflex legs
– Dumbbell eyes
– Wool
– Bead for articulation
Step 1. Insert first hook in the vise. This will be the rear hook. I normally just use some cheap long shanked hook because I will be cutting off the point. If you prefer to fish the back hook, I would upgrade to a better hook.

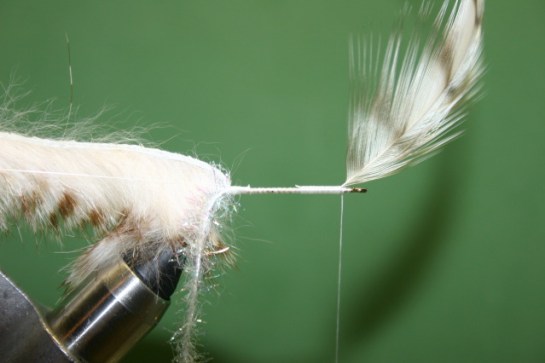
Step 2. Tie in zonker strip by parting the hair, then two wraps in the part, then a few wraps under the strip on the shank of the hook

Step 3. Tie in the chenille. I used a flash chenille, but any type of chenille will work. Also tie in your ribbing material. I used some mono.

Step 4. Bring thread to the front of the hook leaving yourself enough room near the eye to tie in the zonker in a later step. Tie in the hackle curved side up if you can manage it. This will help make the feather lie back when it is palmered back to the bend.
Step 5. The next few steps are just like if you were tying a woolly bugger. Palmer the chenille to behind the eye and tie it down.
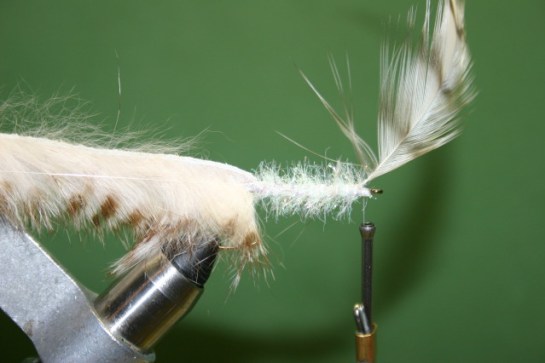
Step 6. This is actually two steps in one. Wrap the hackle back to the bend of the hook. When you get to the bend, grab the ribbing material and use it to catch in the tip of the hackle. Then use the rib to spiral wrap the body (in the same direction as the hackle was wrapped) to the eye. Tie in the ribbing.

Step 7. Tie in the legs. Two on either side.
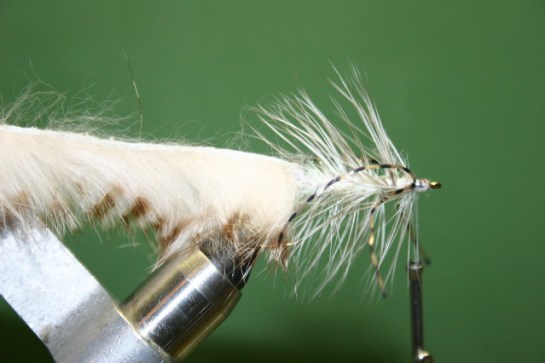
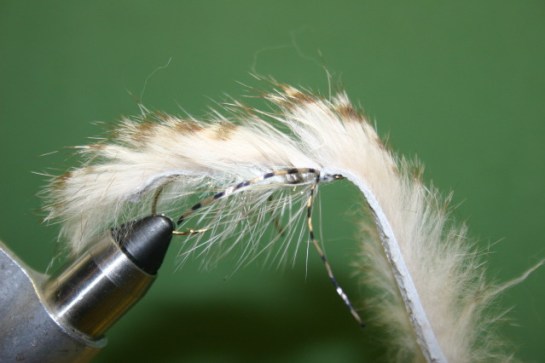
Step 8. Part the hackle on the top of the shank and bring the zonker strip over to the eye. Part the hair on the zonker and tie it down. Don’t cut the strip yet. Whip finish the thread between the eye and the zonker strip and cut.
Step 9. Mount the front hook in the vise and wrap a thread base along the hook.

Step 10. Use some string (mono, braid, …) and a bead to create an articulation point. Here I just used some 15 lb mono since I will be cutting the back hook off. If I were going to leave the hook intact, I probably would have used some braided line.

Step 11. Just as you did earlier, pull the zonker forward, separate the hair on the strip and tie it in using two wraps and then a few wraps on the shank.

Step 12. Pull everything back and tie in the rib and chenille.
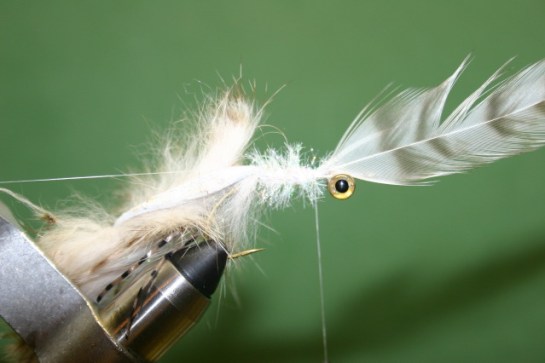
Step 13. Bring thread forward and tie in the dumbbell eye on the bottom of the hook shank.

Step 14. Tie in another hackle about an eye length behind the dumbbells.

Step 15. Do the same as you did on the back hook. Palmer chenille forward, tie in. Palmer hackle back, catch with the rib, and cross wrap the rib back to the tie in spot behind the dumbbell eyes and tie it in.
Step 16. Tie in rubber legs. Two on either side.
Step 17. Part the hackle on the top of the shank, pull over the zonker and tie in. This time, tie in the zonker catching in all the hair on the strip. This helps fill in the void between the strip tie in and the wool head. Tidy up the tie in spot.
Step 18. Tie in a clump of wool behind the eyes and directly in front of the zonker. You can tie in two separate clump, one on bottom and one on top, if you want. I prefer to spread the wool fibers flat, shroud the hook shank with them, then use the thread to cinch it down.

Step 19. Pull the first clump of wool back and tie in another clump directly behind the dumbbells and only on top of the shank.

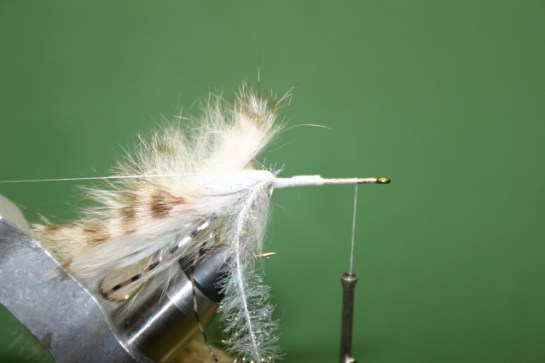
Step 20. Bring thread to the front of the hook behind the hook eye and tie in the last clump of wool. I just push the clump over the eye of the hook and cinch it down with a few wraps. Pull everything back and whip finish the thread behind the hook eye. You should end up with something that looks like this.

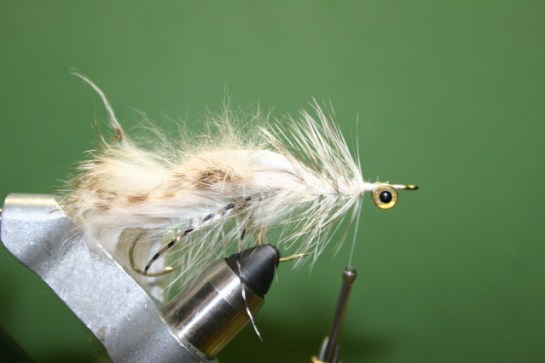
Step 21. Use some scissors to shape the head. Trim it however you like it. Once trimmed, I use some markers to color it up a little.


Step 22. Use some nippers to cut off the back hook bend (if you want to) and you have a finished fly. Enjoy

Proof of concept: