Archive

Tag Archives: Fly of the Month

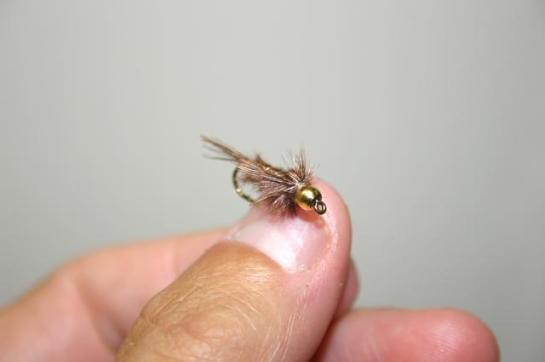
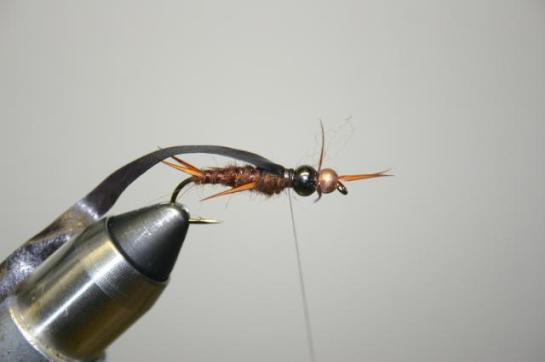
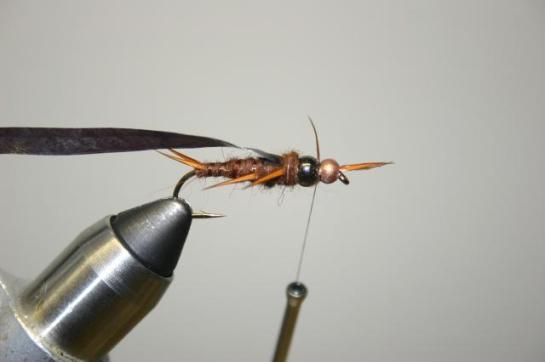
June’s fly of the month is another of Blake’s ties that managed to fool fish at the cabin – the VBF(very big fish) Stone.  I had been relaying any intel I could gather from the creek throughout the Spring to Blake and after hearing about Jim’s run in with a VBF of his own and viewing Dan’s stonefly nymph video, Blake set out to tie something similar that might work to catch these trout.  It has enough weight in it to eliminate the need for extra shot and is more natural looking than a pickle, which should hopefully fool those wise, old trout who know better.

Materials

  • Streamer hook, 4x long
  • Bead – gold to fit the hook and black one size larger
  • Goose biots
  • Dubbing
  • Vinyl ribbing
  • Shell back
  • Thread – I use smaller thread than I normally would just to reduce bulk under the beads

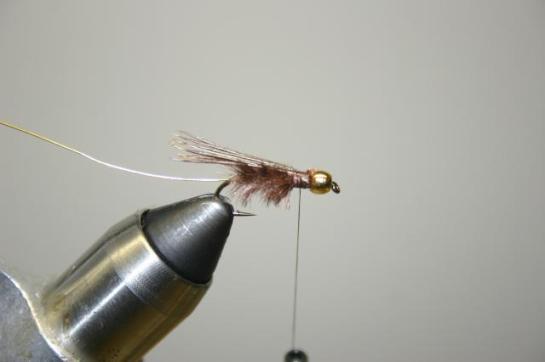
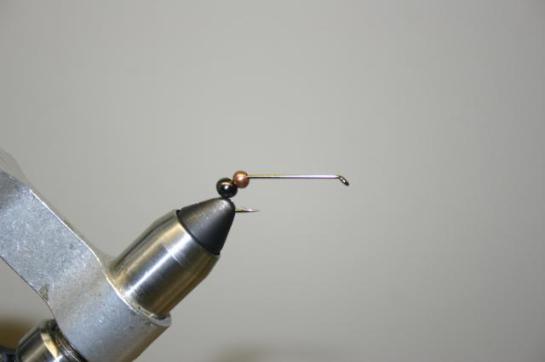
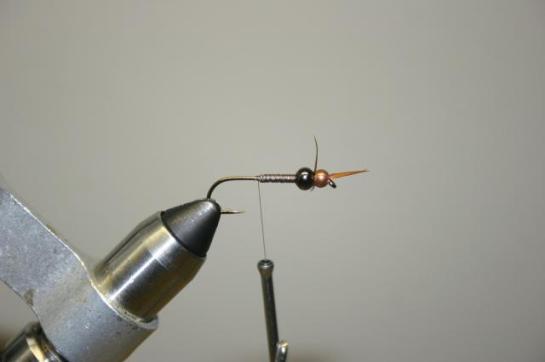
1. Slide beads on the hook, gold bead on normal, and black bead reversed with the concave side facing forward. Start thread behind the hook eye.

IMG_2267

IMG_2268

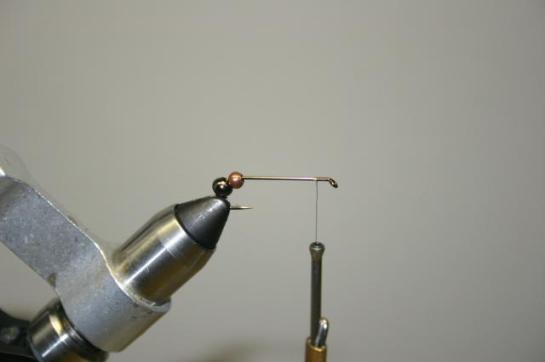
2. Tie in two biots extending over the hook eye. Be careful to not wrap so much thread that you can’t get the bead butted up against the eye. Trim butts, whip finish, add some super glue to the thread then push the bead up.

IMG_2269

IMG_2270

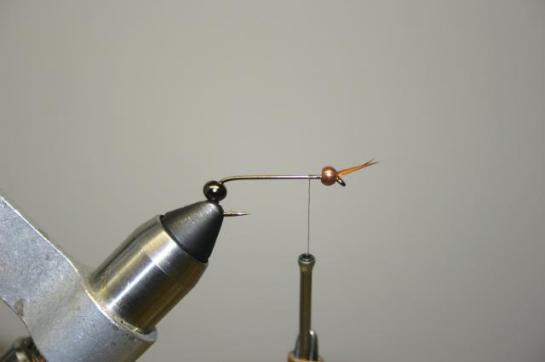
3. Start thread behind the first bead and tie in a biot on either side. I like my legs to be about half the shank length. I like to use enough thread so that the bead is snug when I slide it up the shank. Whip finish, super glue, the slide up the bead.

IMG_2271

IMG_2272

IMG_2273

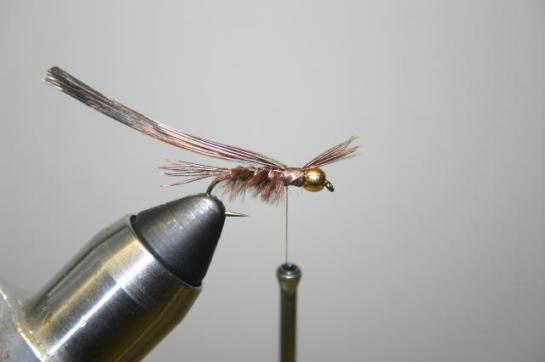
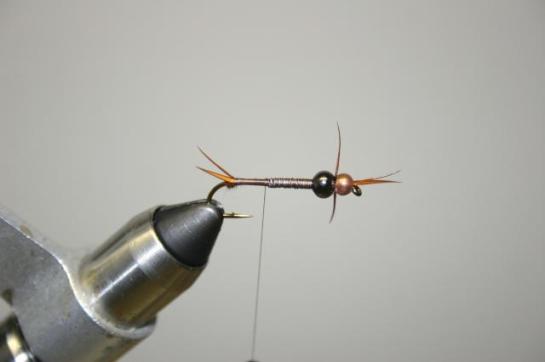
4. Wrap lead on the shank. Start thread behind the lead and wrap the lead with a layer of thread.

IMG_2274

5. Wrap a small ball of dubbing right before the hook bend. This will help to splay out the tails.

IMG_2275

6. Tie in two biots at the bend.

IMG_2276

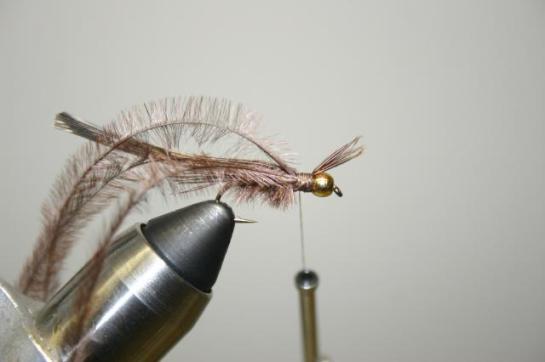
7. Tie in ribbing material at the far side of the shank

IMG_2278

8. Dub the body

IMG_2279

9. Palmer the rib and tie off in the space behind the bead.

IMG_2280

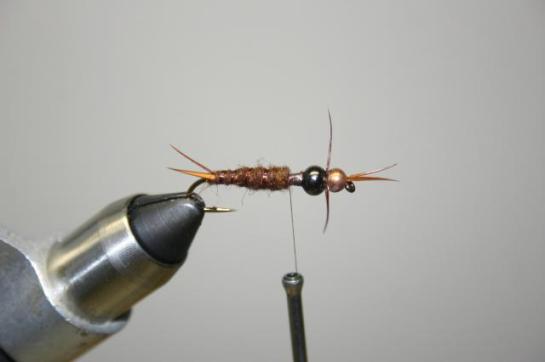
10. Tie in shell back material.

IMG_2281

11. Biot on either side.

IMG_2282

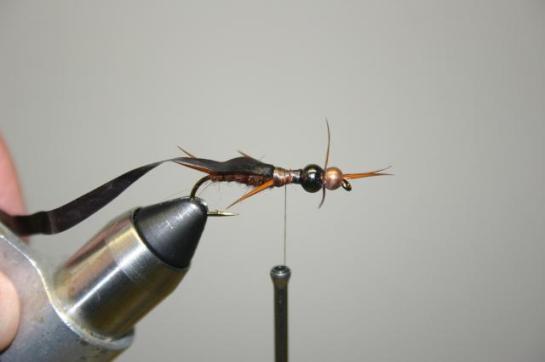
12. Dub leaving a small space behind the bead to tie in the next set of legs. Bring shell back over and tie it in.

IMG_2283

IMG_2284

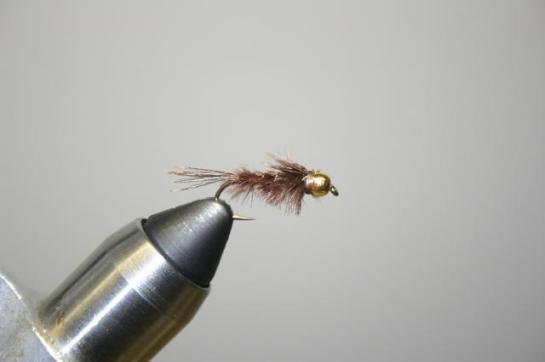
13. Tie in next pair of legs then dub the body up to the bead. Whip finish behind the black bead.

IMG_2285

IMG_2286

14. Start the thread between the front legs and the gold bead. Add some dubbing here to make those front legs angle towards the back of the fly.

IMG_2287

IMG_2288

15. Bring shell back over the bead and tie in right behind the gold bead. Cut the extra shell back and whip finish.

IMG_2289

IMG_2290

IMG_2292

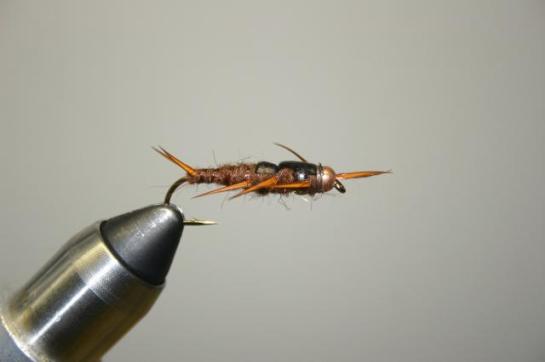
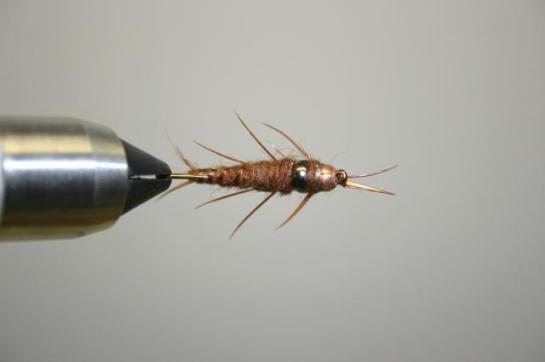
I like to give the shell back a coating of SHAN to make it shiny. Finished Fly. Enjoy

IMG_2293

This eager trout took the VBF stone not more than 30 minutes after I caught it on a dry.

IMG_2446

We’re a little late with May’s fly of the month, but it’s by design.  We’re continuing to feature flies that have worked for us on the trout at the cabin, though prior to this month they were all from last year’s trip.  I’m fairly certain they will work for trout elsewhere and probably other fish too.  The first one will be a beadheaded version of the featherduster nymph which was first tied by Wally Eagle out in West Yellowstone.  As you’ve probably guessed the original pattern was tied from a feather duster.  The sizes that were effective in North Georgia were 14 and 16, but this one is tied in a size 12 for purposes of picture clarity.

Materials:

  • 2x long nymph hook(I prefer 2x long hooks when using a bead and regular hooks without a bead)
  • Bead to fit hook
  • Lead wire
  • Gold wire
  • Ostrich herl
  • Pheasant tail
  • Thread

1. Put bead on hook and slide to the eye.

IMG_2248

2. Wrap lead onto the shank and butt it up against the bead. I put enough lead on there to take up the space where my thorax will be.

IMG_2249

3. Cover lead with thread and create a smooth underbody.

IMG_2251

4. Tie in a wire rib on the far side of the hook. I tie it in on the far side so that the first half wrap goes under the hook.

IMG_2252

5. Tie in two peacock herls at the bend and bring thread to the area at the start of the thorax. Twist herls together and palmer. I try not to make this very dense.

IMG_2253

IMG_2254

6. Measure some pheasant tail fibers for length and tie them in at the thorax. I like my tails to be roughly half the length of the hook shank.

IMG_2255

7. Use the wire rib to tie down the pheasant tail.

IMG_2256

8. Tie in a few more pheasant tail fibers with the tips pointing over the eye. These will be the legs, so they should also be roughly half the length of the hook shank. The butt ends of the fibers will become the wing casing.

IMG_2257

9. Tie in a few more herls, twist together, and palmer. You could twist these with the thread to reinforce the herl if you want. I like to make the thorax area a little more dense than the abdomen.

IMG_2258

IMG_2259

10. Separate the pheasant tips, pull the butts over to form the wing case, and tie them in dividing the tips.

IMG_2260

11. Cut off the butts and whip finish.

IMG_2261

IMG_2262

IMG_2263

Finished fly, enjoy!

IMG_2264

This kype jawed rainbow fell for the beadhead featherduster nymph.

IMG_2448

The fly of the month for April is the spawn of a beadheaded woolly bugger and the pickle. Each of these flies has been extremely effective on trout at the cabin, the hope here is that this fly is doubly effective. Okay, so I don’t think it works like that, but this fly should work pretty well too. We’ll put it to the test Memorial Day weekend. Thanks to Blake for another great pattern.

Materials:

  • Streamer hook of your liking
  • Bead to fit hook
  • Lead wire for the shank
  • Marabou
  • Rubber legs
  • Hackle
  • Dubbing
  1. Put your bead on your hook and wrap the shank with as much lead as is desired. Getting this fly down in the water column will be important, so I put a good bit of .020 lead on. The heavier the fly, the less shot that I will have to put on. Slide the lead up the shank so that it butts up against the bead. This helps keep the bead in position.

IMG_2094

2. Lay down a layer of thread to lock everything in place.

IMG_2095

3. Tie in your marabou at the bend, a little shorter than as if you were tying a normal woolly bugger.

IMG_2096

4. Tie in a leg on either side of the tail.

IMG_2097

5. Bring your thread to the midpoint of the shank and tie in another leg using figure 8 wraps. Repeat for the other two legs.

IMG_2098

6. Tie in the hackle with the curved side facing out. We want the barbs to point towards the tail rather than forward when we palmer it back.

IMG_2100

7. Dub the body of the fly starting at the head and finishing at the bend. Leave the thread here to use to catch the hackle for the ribbing.

IMG_2101

8. Palmer the hackle to the bend. When you get to the bend, grab the thread and make a wrap catching the end of the hackle. Then spiral wrap the thread as a rib to the bead.

IMG_2102

9. Clip the hackle tip and whip finish behind the bead. Finished fly.

IMG_2104

IMG_2107