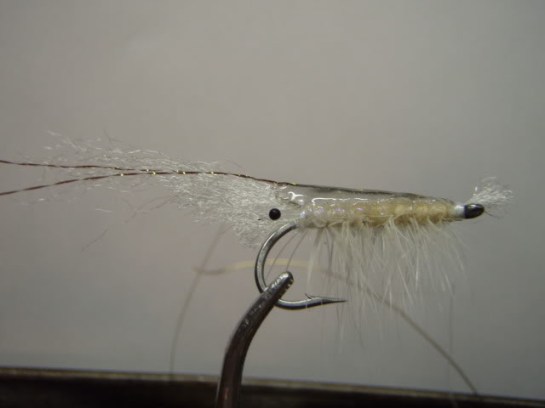
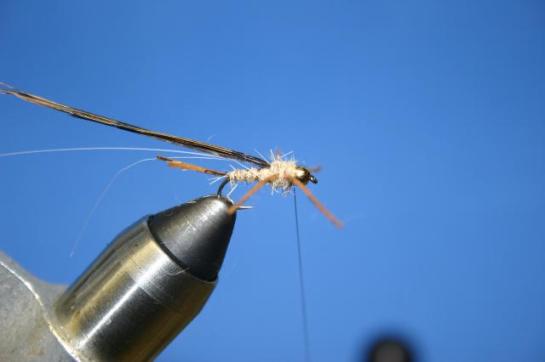
September’s fly of the month is, in my opinion, one of the more realistic shrimp patterns out there. It is Blake’s version of Bob Popovics Ultra Shrimp fly. This is a great pattern for inshore use, especially at night, under the lights. It should be pretty durable too with that UV Knot Sense. Speckled trout of Grand Isle beware, this fly is coming for you.
Materials:
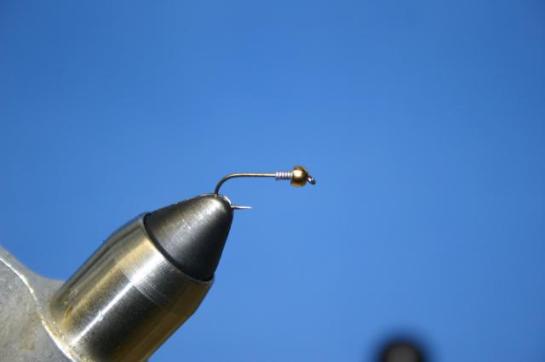
Mustad 3407 size 2
EP fibers
Mono eyes
Krystal flash
White thread
Loon UV Knot Sense
Soft/webby bugger hackle
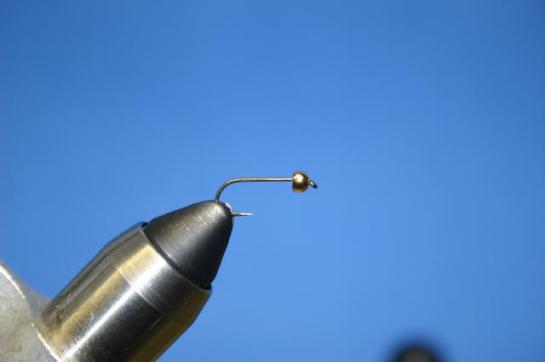
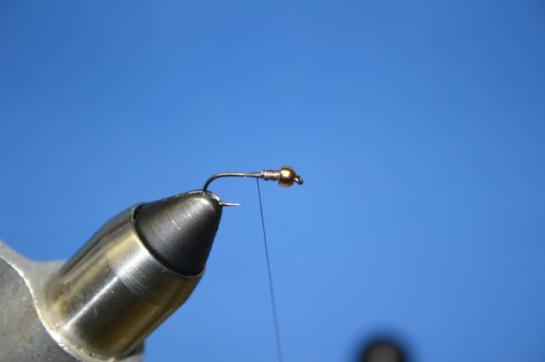
Attach thread and bring to the bend. Prepare some mono eyes using a lighter and sharpie marker to color them black.

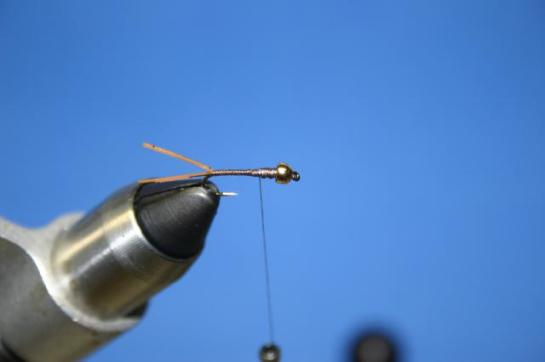
Tie in a small clump of EP fiber down a little into the bend.

Tie in eyes on each side. I put a thread bump in front of the tie-in spot to splay the eyes out a little.

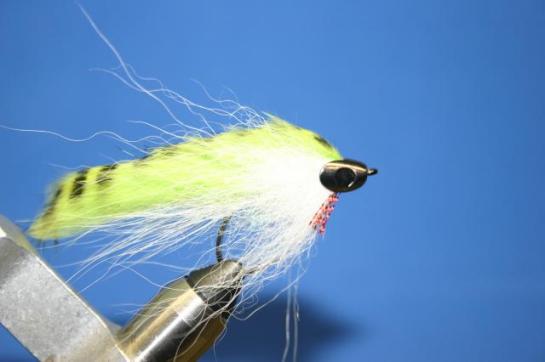
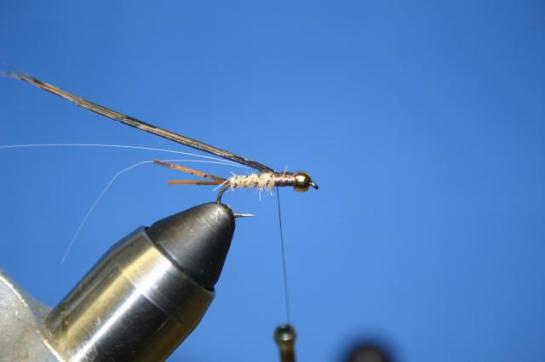
Tie in the hackle by the butt so that when wrapped, the longer fibers will be towards the back and the shorter around the eye. Dub the body of the fly, including around the eyes. I forgot to dub around the eyes, but I don’t think it matters, just looks better to the fisherman.

Palmer the hackle and tie off at the eye. I try to get the fibers to lay back towards the bend.
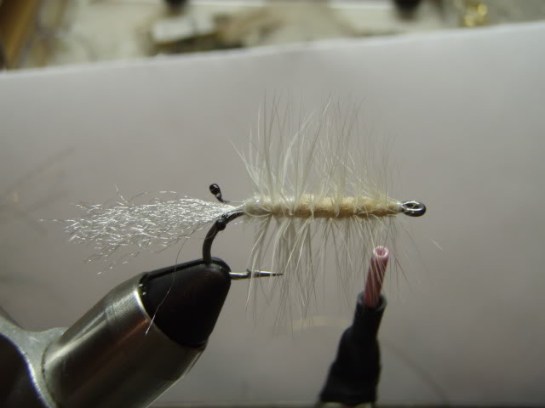
Cut the top half of the fibers pretty close to the body.

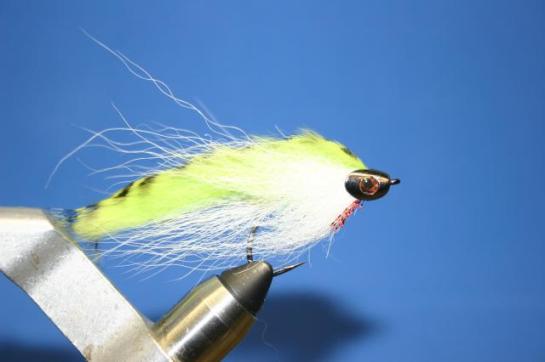
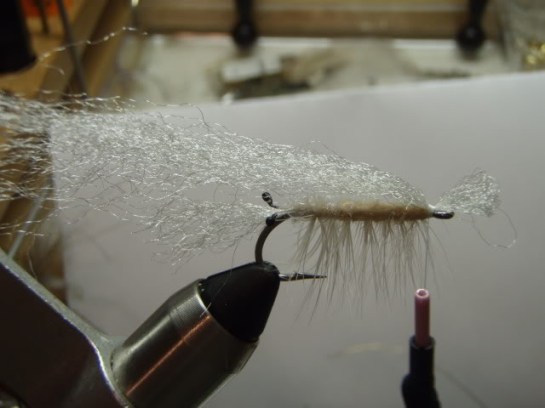
Tie in another longer clump of the EP fibers. Here i used double what i tied in in the earlier step. The bottom picture is what it looks like when you pull the fibers tight.
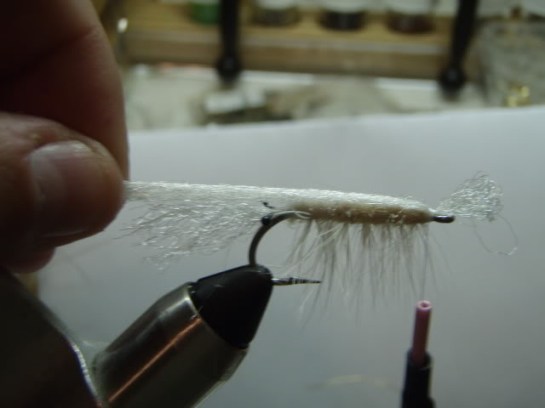
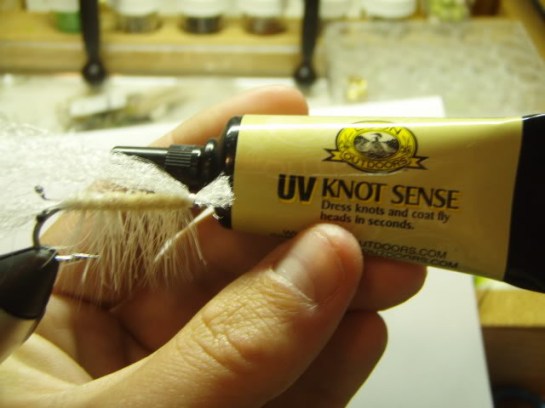
Then add UV knot sense. I run a bead between the body and the fibers and then some in the fibers themselves. If you put some tension on the fibers, the glue oozes out of the fibers and creates a smooth body. I also pinch the fiber to make the vertical and create the profile i want. Below is the fibers under tension and not under tension with the glue applied.


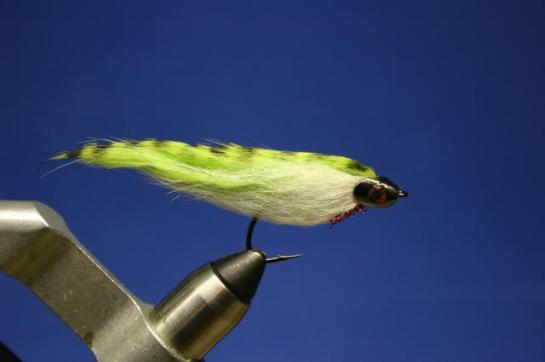
I added two strands of crystal flash for the antenna then cured the glue with the UV light. Here’s the finished product. color can be changed by either coloring the EP fibers or using different colored body materials (dubbing, chenille, etc.).