Archive

Fly Tying

July’s fly of the month is a variation on the deceiver fly originally created by the legendary Lefty Kreh. The deceiver is a fly that works anywhere, fresh or salt, nearshore or far. This is Blake’s version of the proven pattern.

Materials:

– Your favorite thread, somewhat heavy so you can put some pressure on it. I used 3/0.

– Lead Tape

– Saddle hackle

– Flashabou

– Chenille

– Bucktail

– Peacock herl

– Krystal flash

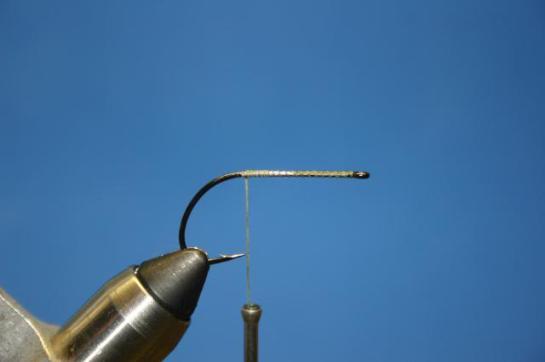
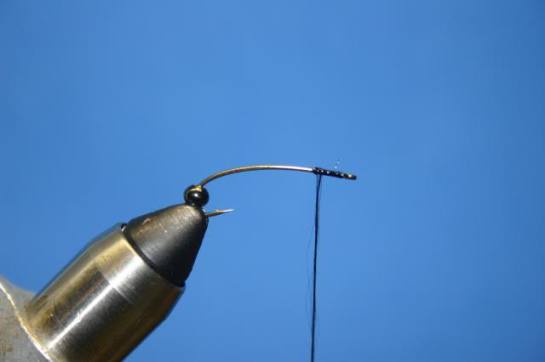
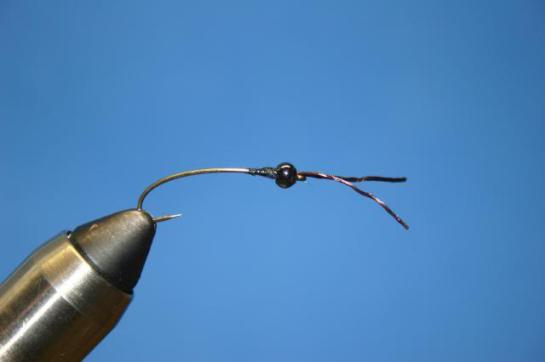
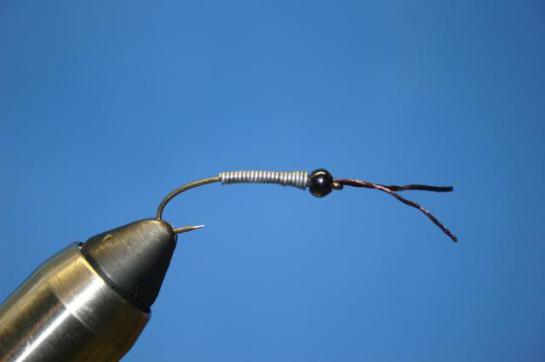
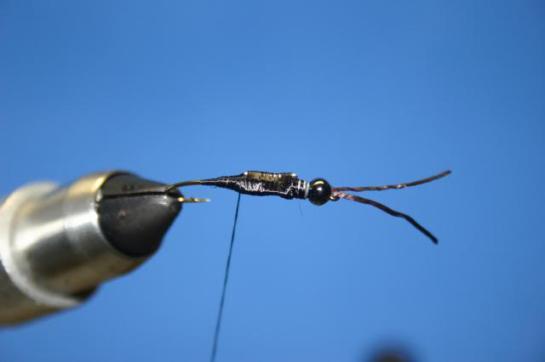
Step 1. Clamp hook in vise and wrap the shank with lead tape. Round lead wrapped around the shank will work also. Or no lead if you want a lighter fly. Start thread and lay a base over the shank and the lead. The lead tape that I use is sticky backed and normally used to stick on hard bodied floating lures to get them to sink or suspend.

IMG_0976

IMG_0977

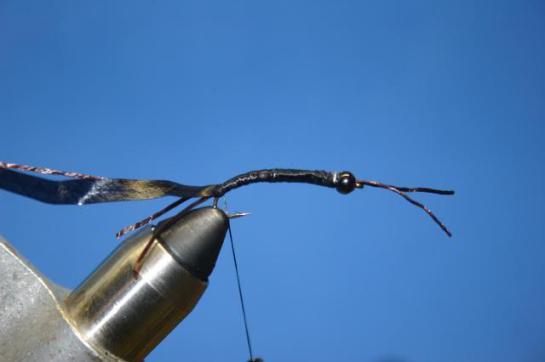
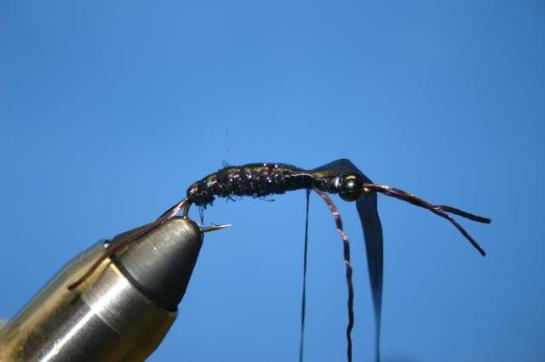
Step 2. Select your desired amount of hackles for the tail. I normally use two feathers, but I decided to go with four on this one and dress it a little heavier than I normally would. Tie them in and wrap down to tidy up the hook shank

IMG_0978

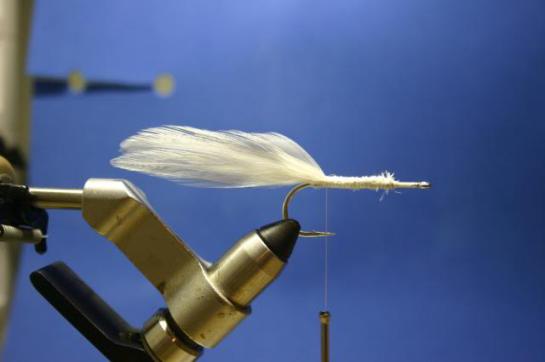
Step 3. Tie in flashabou, a few strands on either side. Trim it so that it is a tad longer than the hackles.

IMG_0979

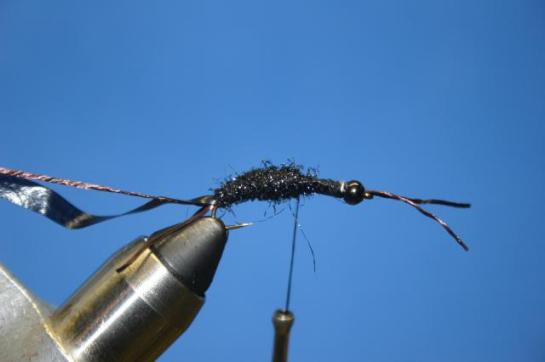
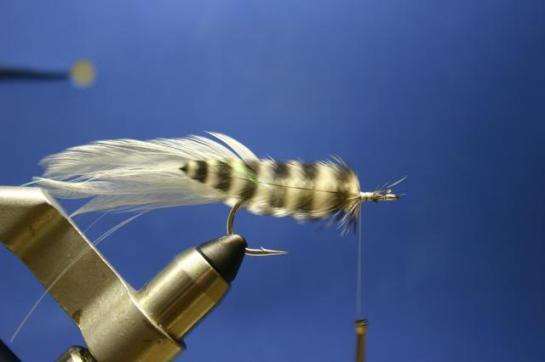
Step 4. Tie in chenille and wrap up the shank making sure to leave yourself enough room to finish the head.

IMG_0980

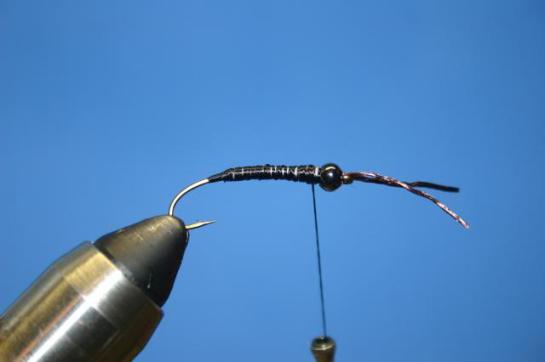
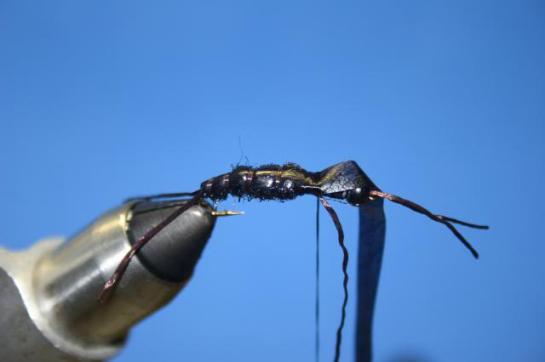
Step 5. Tie in a grizzly hackle on either side. I should have tied them a little longer along with the tail. Fish won’t care.

IMG_0981

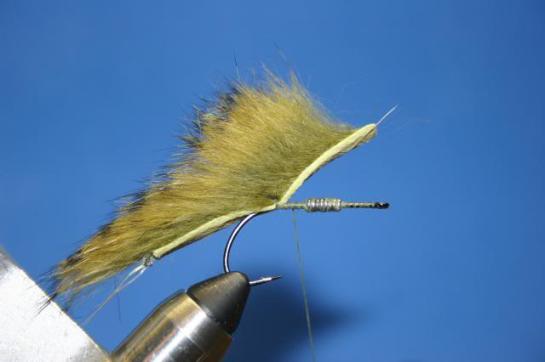
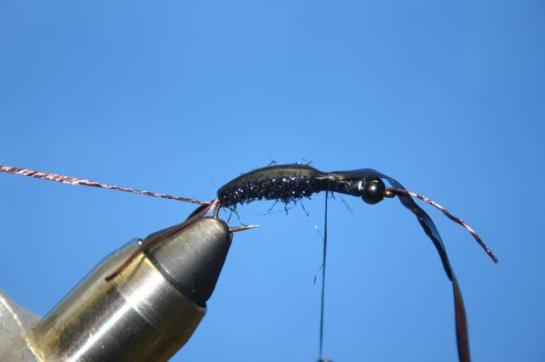
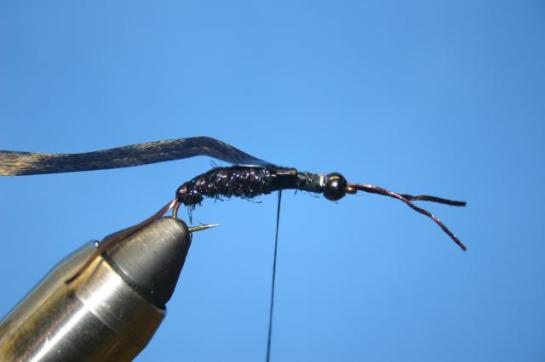
Step 6. Select some bucktail fibers and tie them on the top of the hook. I like to press them down with my thumb to make them spread out around the top 1/3 of the shank.

IMG_0982

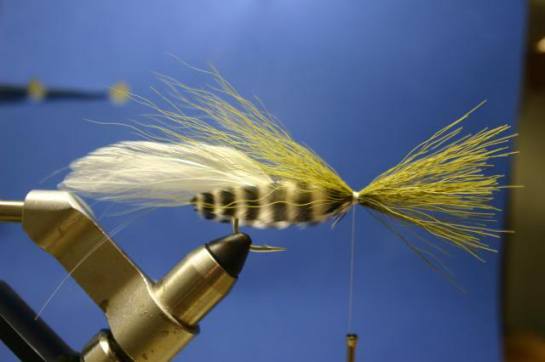
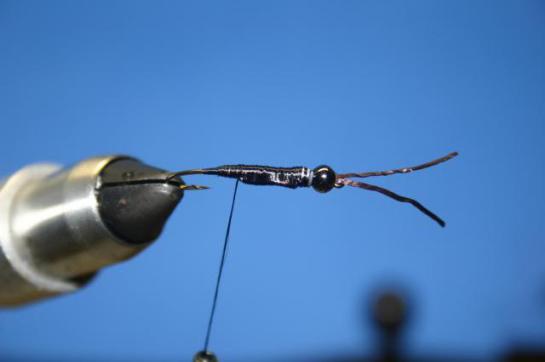
Step 7. Select some other color for the belly of the fly and tie it in. This clump is normally a little bigger than the top clump. Do the same as above and press the butts to spread them around the hook shank to fill in the other 2/3.

IMG_0983

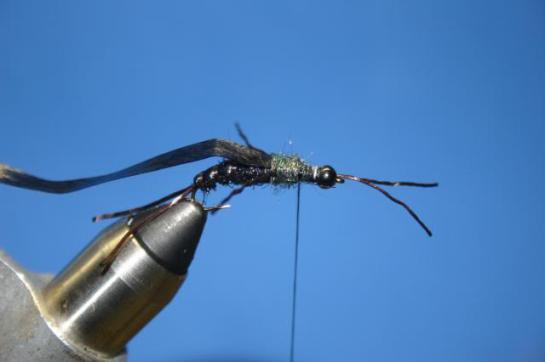
Step 8. Tie in some peacock herl on the top.

IMG_0984

Step 9. Tie in some red krystal flash on the bottom.

IMG_0985

IMG_0986

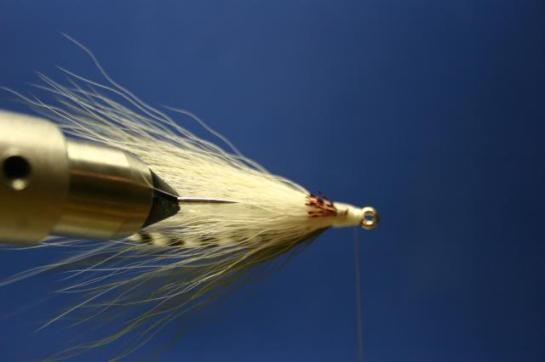
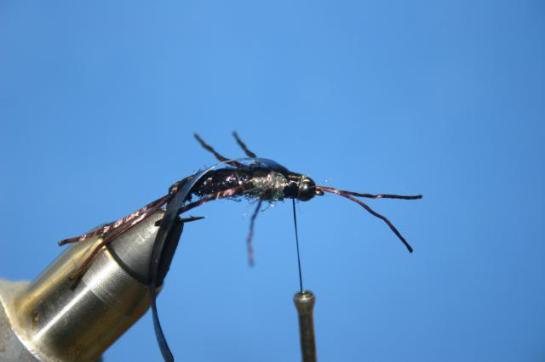
Step 10. Tidy up the head and whip finish. Apply some super glue to the head and stick on eyes.

IMG_0987

Step 11. Once the eyes are tacked on there, mix up some epoxy and coat the eyes and head. Put it on a spinner to cure.

IMG_0989

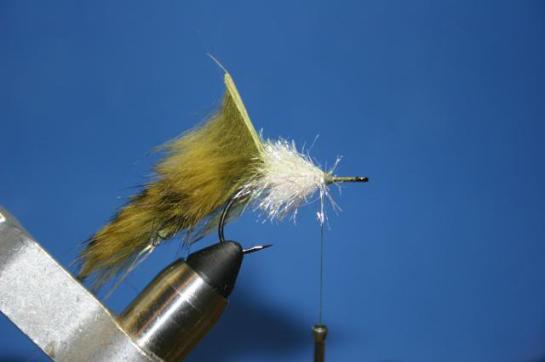
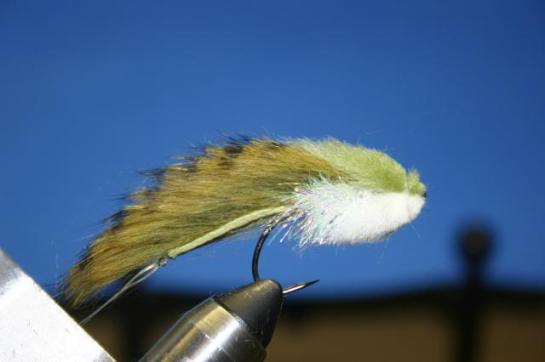
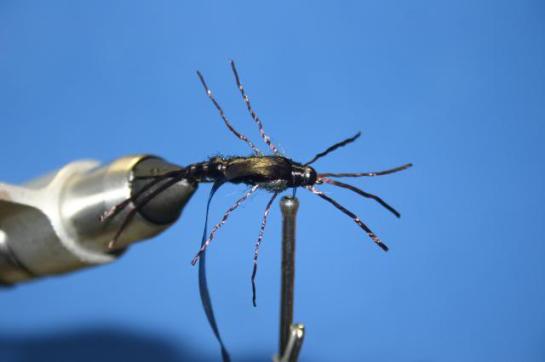
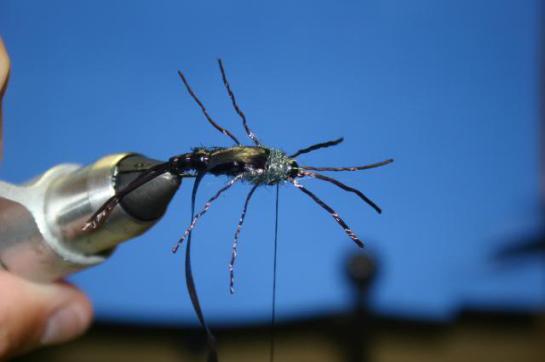
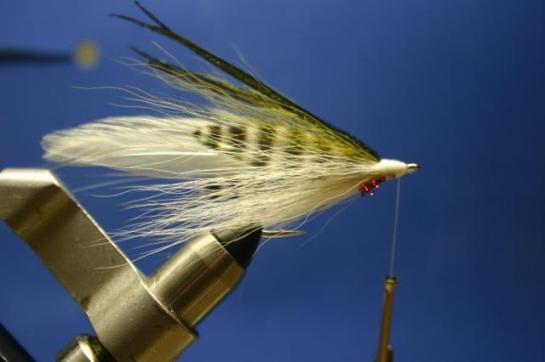
Finished fly. Mine always look a little unruly off the vise. If you run it under a little hot water and let it dry hanging from the hook eye, it should tame some of the fibers. Also, you can curve the herl like you do ribbon (ask your significant other for assistance)

Before wet/dry:

IMG_0991

After wet/dry:

IMG_0997

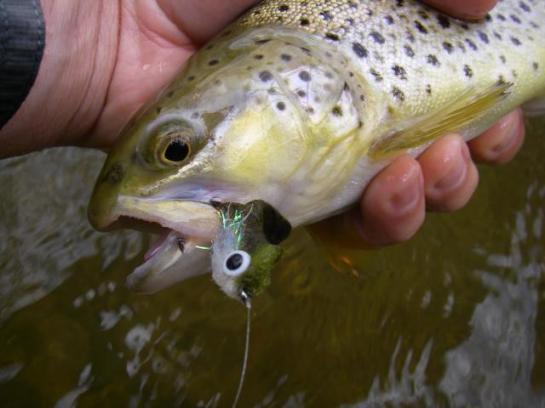
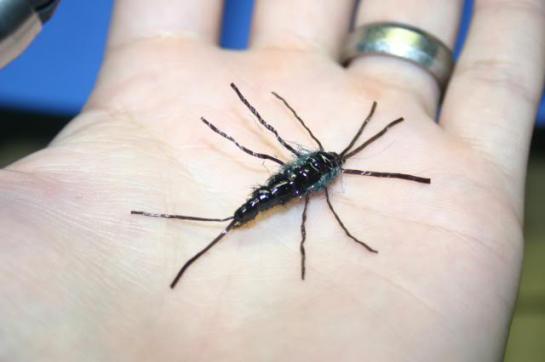
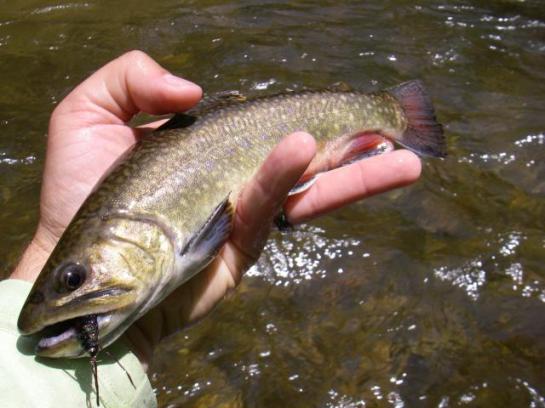
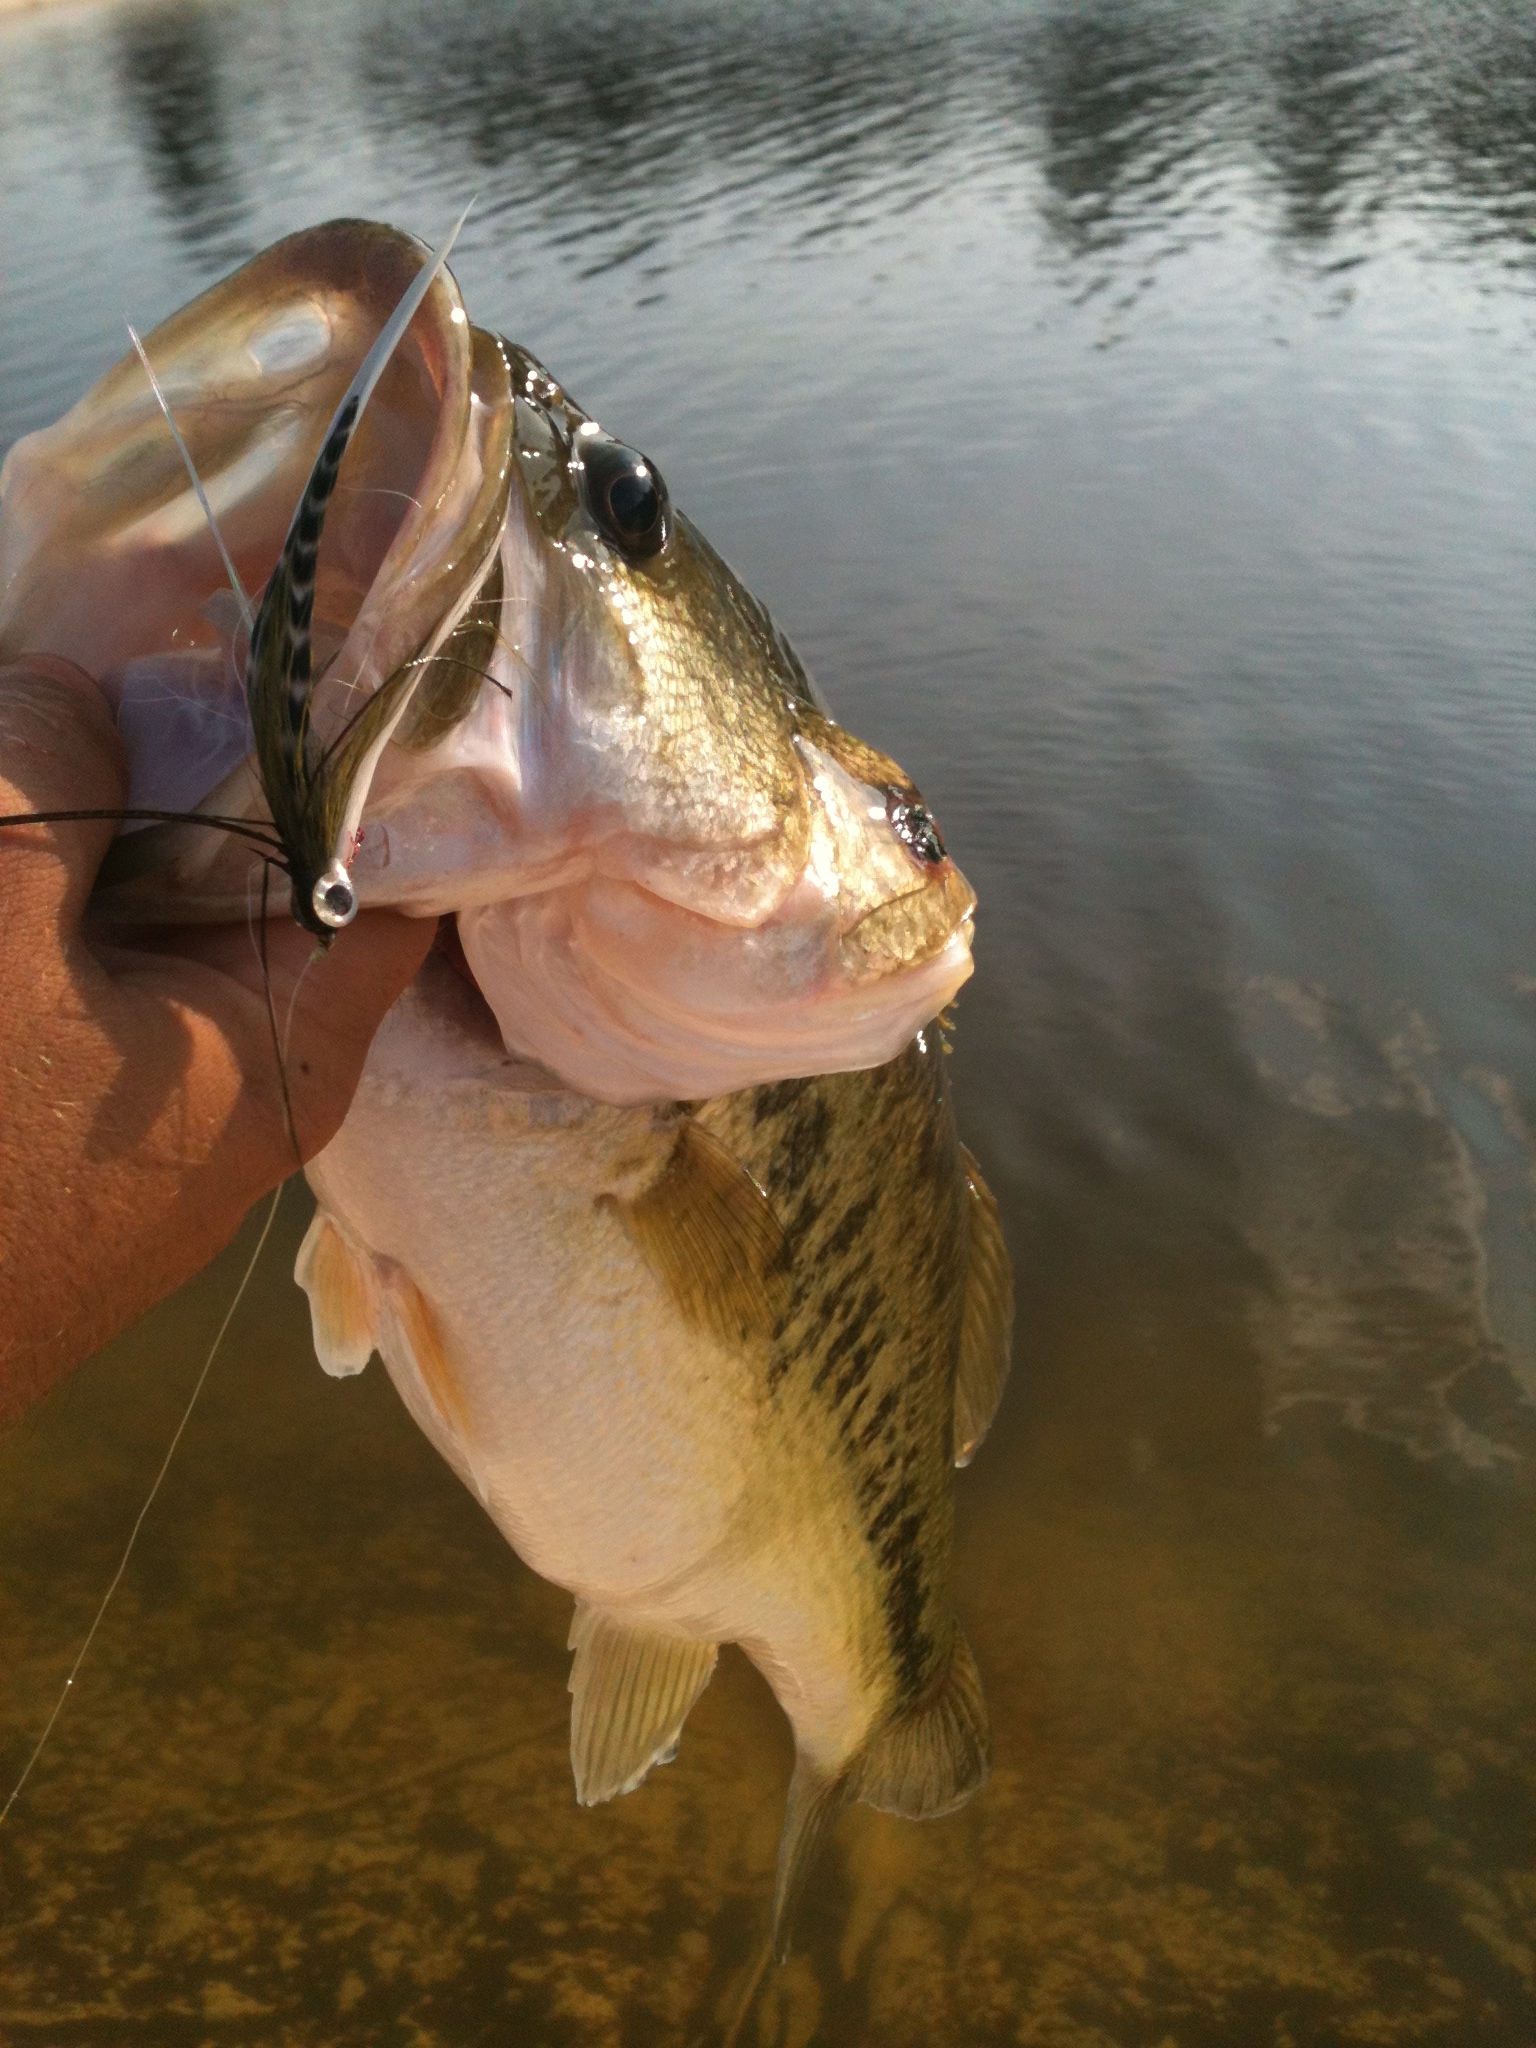
Proof of concept – freshwater:

LMB_1a

LMB_3a

Enjoy!

June’s fly of the month is one that I had some success with for trout in Georgia back in April, it should also be a killer bass and redfish fly though as it’s one of the most realistic looking flies I’ve seen in the water. Blake tied this up and provides his instructions below:

Materials:

– Flashabou

– Zonker strip

– Flash chenille

– Wool roving

– Doll eyes

Step 1. Use your bodkin to punch a hole at the end of the zonker strip. Use your bobbin threader to pull a few pieces of flash through the hole.

IMG_0785

IMG_0786

IMG_0787

Step 2. Mount a needle in the vice and start the thread on the end with only a few wraps.

IMG_0788

Step 3. Tie the flash together behind the zonker keeping it from falling out. I’m sure I could have just tied it in to the shank of the hook, but I just wanted a little flash at the back of the fly, so I did it this way.

IMG_0789

Step 4. Whip finish, pull the whole thing off the needle, use your choice of cement on the threads.

IMG_0790

Step 5. Mount hook in vice and lay down a thread base to the bend of the hook.

IMG_0791

Step 6. Add whatever amount of lead that you want along the hook shank and cover with thread.

IMG_0792

Step 7. Tie in zonker with a couple wraps at the start of the hook bend.

IMG_0793

Step 8. Tie in the flash chenille and palmer up the fly leaving enough room for the zonker tie in and the head.

IMG_0794

IMG_0795

Step 9. Do your best to part the flash on the top of the hook, pull over the strip, and tie it in.

IMG_0796

Step 10. Use whatever material you like to make the head. I used some wool roving that I got from Joann fabric. It’s a lot of material. I don’t remember the cost, but since it isn’t made for fly tying, I’m sure its cheap. I skipped some steps here by accident. I tied one clump of white on the bottom, then one clump of green on the top. Pull back and make a couple wraps on the shank to secure, and then repeat behind the hook eye. I only used 2 separate tie ins, but if you use less material, you may need more. You end up with something like this.

IMG_0797

IMG_0798

Step 11. Whip finish behind the hook eye and trim the fly to the desired shape. I like to go pretty tall on the top and bottom, and pretty short on the sides.

IMG_0799

Step 12. Cut the extra plastic off the back of a doll eye and glue on. I like to use household goop. It doesn’t run, gets in the fibers well, and holds the eyes on well. A little more trimming after the eyes are on and I’m left with a finished fly.

IMG_0802

IMG_0804

Enjoy, and as always, a little proof of concept:

IMG_0720

IMGP7872

IMGP7878

May’s fly of the month is a stonefly pattern that Blake had tied up that proved very effective on the trout at the cabin. Blake notes that “this fly is an amalgam of several different patterns. I just chose the different things I liked from them and put them all together.” Truth is, this wasn’t the pattern that slayed them on Thursday, that was a Pat’s Rubber Legs, a much easier tie, but what fun is that for a SBS.  Pick whichever you prefer, as Blake so eloquently stated, “or you could just tie the easier and equally effective “pickle” and not be as ticked off when you lose one on a snag.”

Materials:

– 3x long curved shank hook

– Spanflex legs and ribbing

– Stretch skin for back and casing

– Black and peacock ice dub

– Bead

– Lead wire of various sizes 

Step 1. Put bead on hook and start thread behind the eye. Make a small thread base and coat with glue.

IMG_0753

Step 2. Tie in legs to create two antennae. Push bead up over the tie in area to make sure that it will fit. Pull bead back, then whip finish and part off the thread. Add some glue to the tie in area and push bead to the eye to secure it.

IMG_0755


Step 3. Start to build up the body with a layer of lead along the shank up to the back of the bead. I use a good bit of lead on this fly to reduce the amount of shot that I have to put on the line to get it down to where the fish are.

IMG_0756


Step 4. Start thread and lay down a layer over the lead.

IMG_0757


Step 5. Tie in a piece of lead length wise along either side of the hook shank. I used a larger diameter lead wire here. My goal is to make a heavy, vertically compressed body shape with a gradual taper from tail to head.

IMG_0758

IMG_0759

Step 6. Tie in two legs at the back of the fly just as you did at the eye. Notice the shape of the body from the top view above to the one below,  vertically compressed with a gradual taper from tail to head.

IMG_0760

Step 7. Tie in another piece of spanflex for the ribbing.

IMG_0761

Step 8. Tie in the stretchy nymph skin for the back/casing.

IMG_0763

Step 9. Dub the body to a point a little over half way point. I like to make a little contrast between the abdomen and the thorax so I used black ice dub here and peacock ice dub in a future step.

IMG_0764

Step 10. Pull the shell back up and tie it in.

IMG_0765

Step 11. Rib the abdomen.

IMG_0766

IMG_0767

Step 12. Cut off the ribbing material and pull the casing back. Tidy up the shank to the spot right before the dubbing starts.

IMG_0768

Step 13. Tie in a leg on either side. Dub around the legs and a little down the hook shank.

IMG_0769

IMG_0770

Step 14. Pull the shell casing over and tie it in. then pull it back and prepare the hook shank for the next leg tie in.

IMG_0771

Step 15. Tie in another set of legs, dub, then pull shell casing forward same as you did above.

IMG_0772

IMG_0773

IMG_0774

Step 16. Tie in two more legs. I tied them more forward facing. Dub between the bead and the casing. Pull casing over and tie it in between the legs and the bead.

IMG_0775

IMG_0777

IMG_0778

Step 17. Whip finish and you have a completed fly.

IMG_0782

IMG_0780

Enjoy, but first some proof of concept.

IMGP8095

IMGP8108

IMGP8120