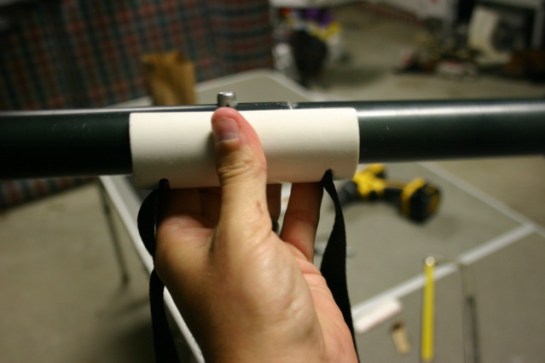
Blake has his own version of a paddle clip belt and he has shared with us how he made it below. The only similarity with the one I initially made is the fact that it holds a paddle. He made his own clip out of PVC and used a lashing strap for the belt. Both versions work as designed and we’ve found them to be extremely helpful when stand up kayak fishing. Not satisfied, he went a step further and made one similar to the Dawgknots belt out of braided paracord. He showed us how to do that as well.

Materials will be listed as they are used in the steps below.

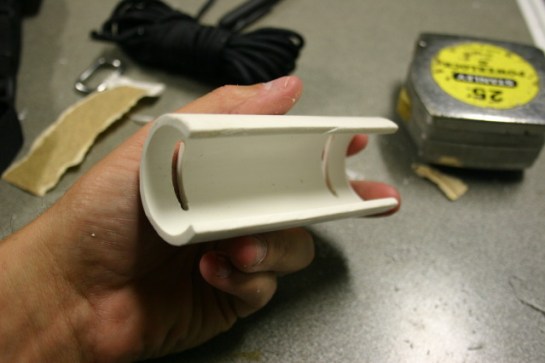
Step 1. Start off with a 4” piece of 1 ¼” PVC pipe. If your paddle has a thin handle, you may be able to get away with 1” pipe, but the bigger diameter is more universal. I also make marks on the top and bottom of the printing on the pipe (it’s just an estimation that is a little narrower than the diameter of your paddle handle).
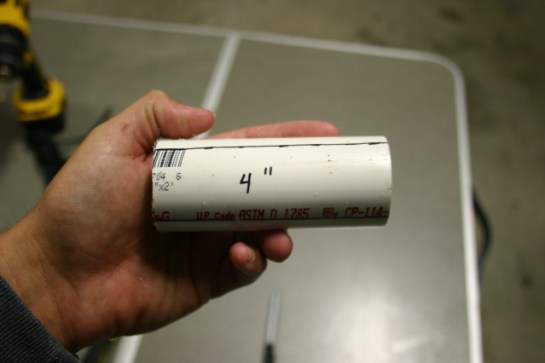
IMG_0281

Step 2. Using a hacksaw (I tried a Dremel tool, but it had too much power and I ended up messing it up), cut along the lines that you drew. Use some sandpaper to smooth out any rough or sharp edges. I used 100 grit. Test the clip on your paddle to make sure that it snaps over and that it’s not too tight that it won’t fit in or too loose that the paddle falls out.

IMG_0282

Step 3. Take your strap (purchased at Walmart in the camping section for $2 and change) and place it along the back of the PVC. Use a marker to put a dot on the PVC on the top and bottom of the strap ½” from each end of the PVC. Use a drill to make a hole at all the spots that you made

IMG_0330

IMG_0284

IMG_0285

Step 4. Connect the edges of the holes and then use your hacksaw to cut out the material in between the holes. Sand all edges smooth.

IMG_0286

IMG_0287

IMG_0289

Step 5. Cut a piece of 3mm craft foam (purchased in sheets at Hobby Lobby) and use some contact cement to attach it between the two slots. You may have to use some thicker/thinner foam to suit your paddle, but 3mm seems to be pretty versatile.

IMG_0290

Step 6. String your strap through the holes in the clip. I like to clip it onto the paddle and let the cement set.
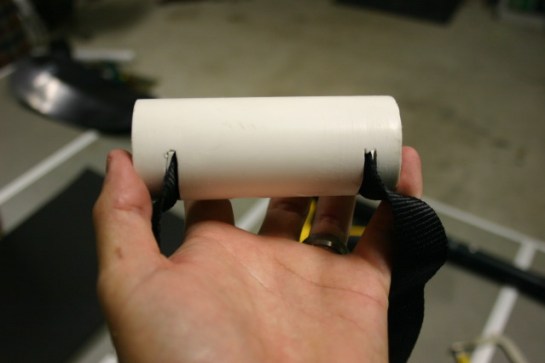
IMG_0291

IMG_0292

IMG_0293

The paddle clip belt will work perfectly as is. However, if you are anything like me and can’t leave “well enough” alone, then check out the next few steps on adding a braid onto the strap.

IMG_0295

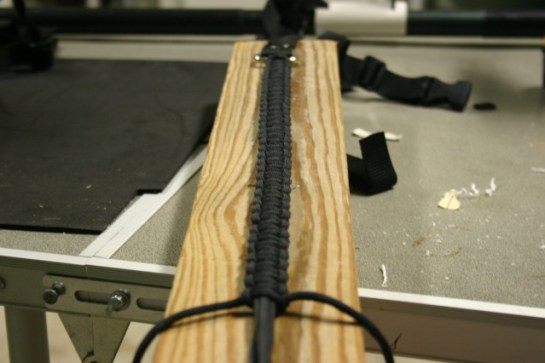
Step 7. The first thing to do is to make a jig out of a spare piece of wood. The jig I used is 20” from end of metal ring (purchased at West Marine) to the end of the female end of the clip (use the male end and some extra strap to secure the clip and ring to the jig.)
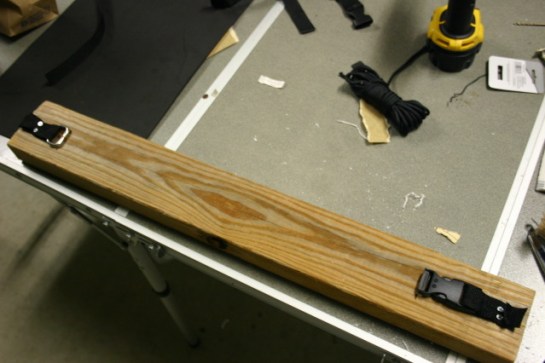
IMG_0296

Step 8. I purchased the Paracord at Lowe’s. It came in 50’ length of 550lb strength (think it was around $10). To make a 20” braid, you’re going to need 25’ of cord. String the cord through the ring. Then string both strands through the female clip, then back through the ring from the bottom to the top.

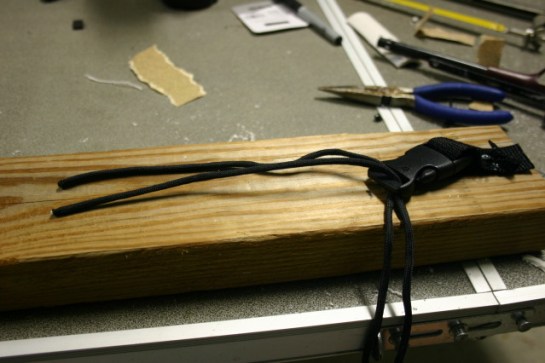
IMG_0297

IMG_0298

IMG_0299

Step 9. Even out the tips of the cord and pull all the slack from between the clips and ring. The first not of the braid is a simple overhand knot

IMG_0301

Step 10. Looking at your first overhand knot, you will notice that one cord comes out of the bottom of the knot and the other comes out of the top. Always start with the cord coming out of the bottom. Bring the bottom cord over and across the top.

IMG_0302

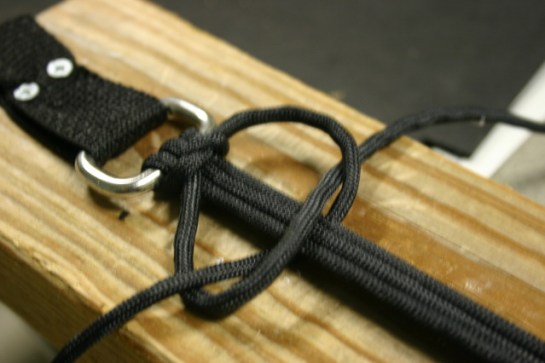
Step 11. Bring the top cord over the bottom cord, under the strands, and through the loop made by the bottom cord. Pull tight.

IMG_0303

IMG_0304

IMG_0305

Step 12. Repeat the steps 10 and 11. Pull tight.

IMG_0306

IMG_0307

IMG_0308

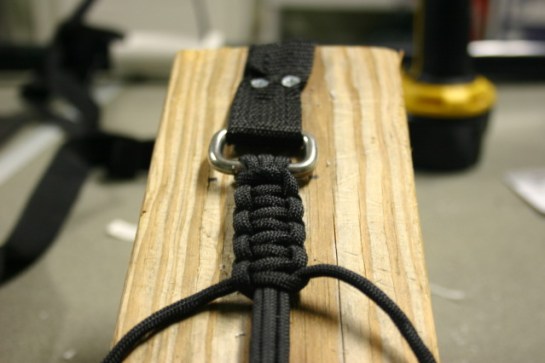
Step 13. Repeat the steps all the way down the strands to the clip.
IMG_0309

IMG_0312

IMG_0313

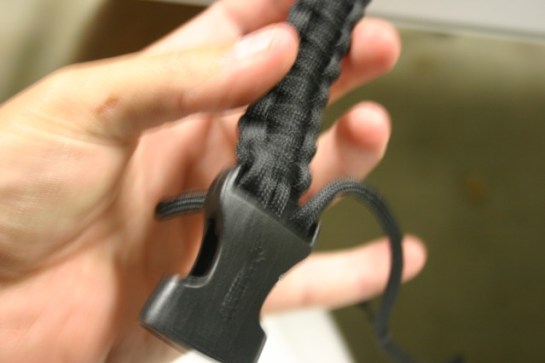
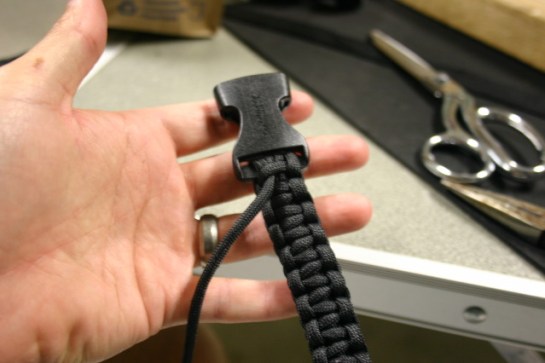
Step 14. String the tag ends through the clip with one going each way so that you end up with a tag on either side of the clip.
IMG_0314

Step 15. Use a leather puller (I used a tire plug tool, but a baseball glove leather puller would work better as it is not open on the end) to pull one tag end under one knot on the braid. After it’s pulled through, do your best to tighten up the knot that you just went under.

IMG_0315

IMG_0316

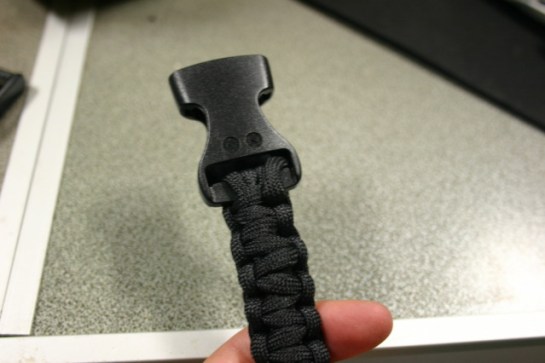
Step 16. Keep threading the tag end under the knots until you are confident that it is secure. I went under 5 on either side. Trim the tag end and tuck it under one of the knots. One side done.

IMG_0317

IMG_0318

Step 17. Do the same on the other side. The braid is complete. Now you have 25’ of unknotted cord to use if you should ever need it. I will just take a while to undo the braid
IMG_0319

IMG_0320

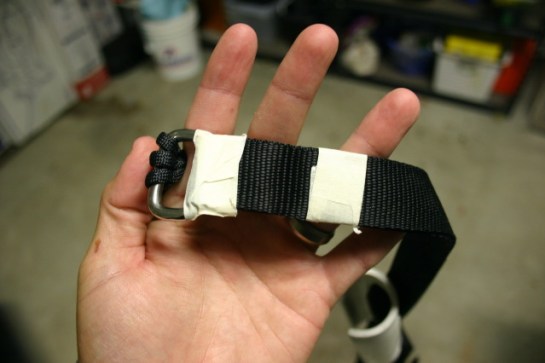
Step 18. With one side of the strap attached to the male end of the clip, thread the strap through the ring at the end of the braid. I like to tape off the strap so that it does not slide in the ring. Sew/glue/knot the strap at the ring. I chose to sew it.
IMG_0322

IMG_0323

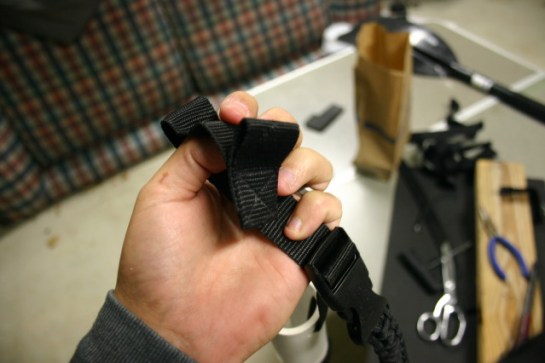
Step 19. Measure the amount of strap that you will need to fit the belt around your waist and trim it. String the strap through the paddle clip, through the male end of the clip, then sew the tag end so that it can’t pull back through.
IMG_0324

That gives you a completed paddle clip belt that has helped me catch many reds while sight fishing. Hope it works out for you.

IMG_0326

IMG_0327

IMG_0329

I rang in the New Year in Atlanta pulling for my Tigers. Unfortunately they were unable to beat the enemy Tigers from that other Death Valley in South Carolina. Still it was a fun trip, I enjoyed another road trip with the wife and time spent with my family back in Fulton County.

It was never really an announced goal or something I planned out ahead of time, but it was pretty fun this past year to catch 12 different species on the fly in 12 months. Accomplishing that led me to try to come up with something different for 2013, perhaps something a little more difficult. Drawing on the inspiration of others before me, I decided on something I’ve been eyeing for a few years now, something that will allow me to fish a ton of new water, targeting species I’ve never caught or even seen in person.

I’m talking about getting back to my bass fishing roots and going for the BASS slam, catching all nine different kinds of bass in one year(technically 8, with the 2 subspecies of LMB). This will put me on the road a good bit, fishing rivers all over the southeast from Texas to Florida. It will involve a great deal of background research so that I can hit the water with confidence knowing I’ll catch the target species, and catching it at the required minimum size.

I’m really looking forward to this challenge and to 2013 being the year of the bass for me. I kind of got away from river bassin’ in 2012, opting to chase redfish most of the time, but that will definitely change this year. The formal BASS slam is the ultimate goal, but I will be more than thrilled to just make it out to all these destinations and land every different type of bass, especially if I can do it with the fly rod….


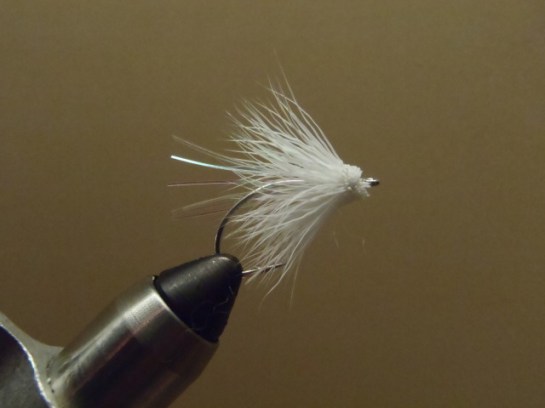
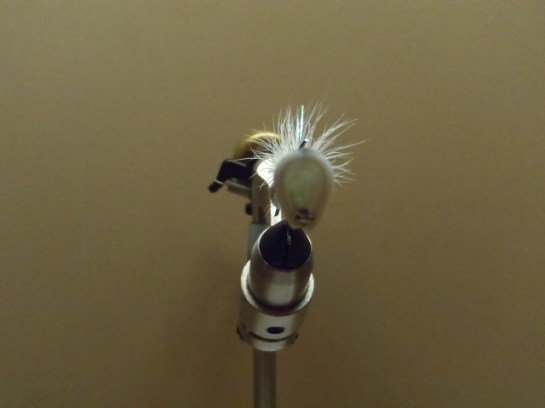
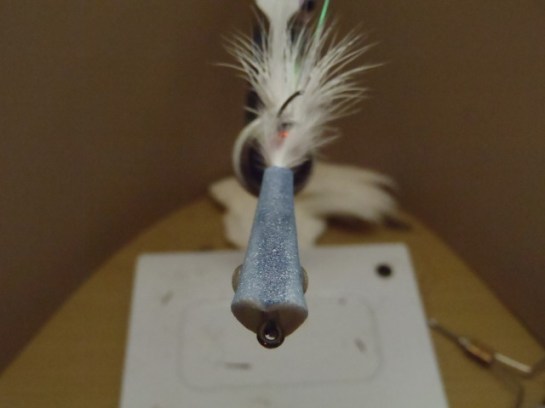
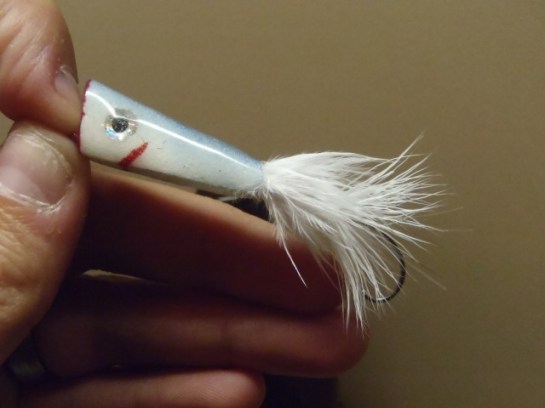
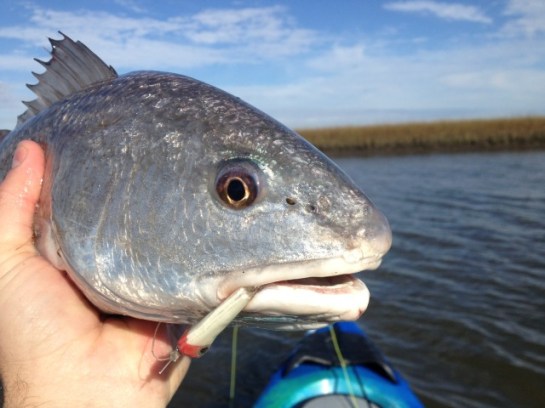
The fly of the month for December is a pattern that will catch a variety of species. I’ve seen it catch bass, redfish, speckled trout, even the overzealous sunfish. Blake use to tie up a bunch of regular crease flies, but we had problems getting hook sets on the spotted bass we would frequently fish for. So, the articulated crease fly was born. To be honest I’ve got no clue whether the articulation helps or not, but it seems to, of course that could just be a mental thing. Whatever the case may be, this fly gets vicious strikes and that is what we all live for as fishermen.

Materials: 

Hooks – Back hook is your favorite, relatively short shanked, hook for whatever species you are pursuing. The front hook will be cut off , so I normally go with a long shank eagle claw hook.

Deer hair and flash for the tail

Bead and 65 lb braid for the connection.

Marabou and foam for the body.

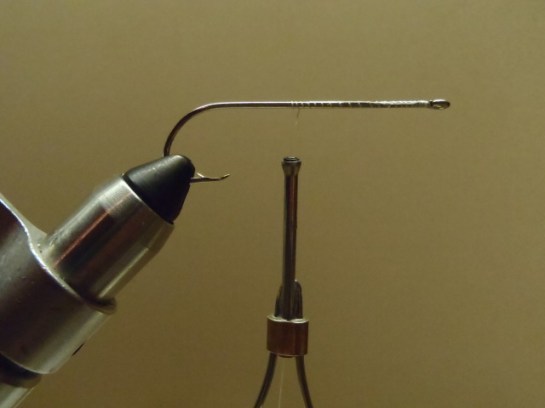
Step 1. Start with the rear hook. Start thread, and make a short base. Apply some superglue to keep the thread from spinning on the shank. Tie in a few pieces of flash.

OLYMPUS DIGITAL CAMERA

Step 2. Spin a clump of hair on the hook. I don’t like a lot on there, but the hollow hair aids in flotation of the back of the fly. Tie off the thread and trim the butts to your liking.

OLYMPUS DIGITAL CAMERA

OLYMPUS DIGITAL CAMERA

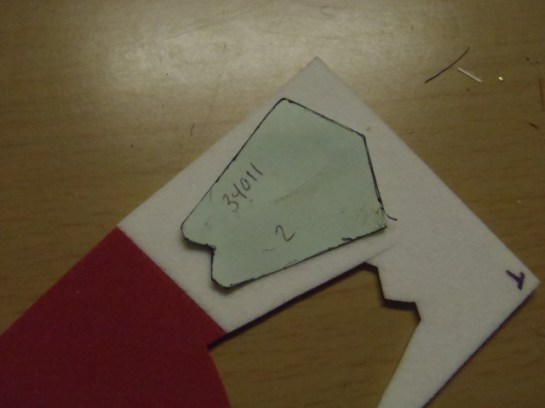
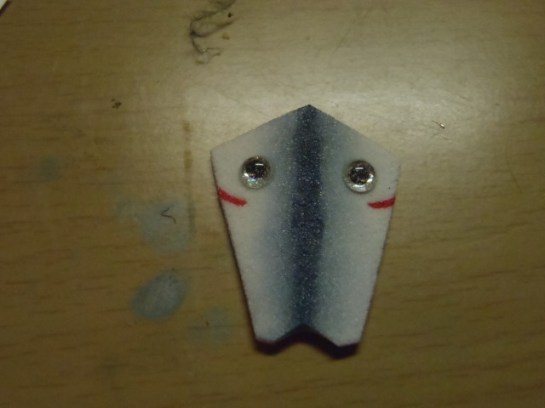
Step 3. Cut out the foam for your body. I made a template that I use to get a consistent shape. To color the body, I use sharpies and my finger to blend it. An airbrush is another option here. Sharpies are surprisingly easy to blend on the foam. I also stick on my eyes at this point using a little super glue.

OLYMPUS DIGITAL CAMERA

OLYMPUS DIGITAL CAMERA

Step 4. Put the front hook in the vise and start the thread. Use the foam cut out to measure where the foam body will end. Stop the thread at that spot.

OLYMPUS DIGITAL CAMERA

OLYMPUS DIGITAL CAMERA

Step 5. Attach the braid to the rear hook. I like to put a loop through the eye, bring the loop around the hook, and tighten. I have also tied them with the braid just going through the eye and then tying it in. Thread the tag ends of the braid through a bead of your choice. I like red. I’m sure the bead isn’t necessary, but I like how it looks. Tie the braid down on the top of the hook starting where the foam will end and going all the way to the hook eye. Insert the ends of the braid through the hook eye and wrap them back toward the bend on the underside of the hook.

OLYMPUS DIGITAL CAMERA

OLYMPUS DIGITAL CAMERA

Step 6. Tie some marabou at the spot where the foam body will end. This is also probably not needed, but I think it adds a little movement so I put it. It also shrouds the bead. Tie down the marabou butts to the eye. This will thicken the hook shank which will give the foam a little more to stick to. Here, I wrap some lead wire around the tail to keep everything out of the way and tie off the thread.

OLYMPUS DIGITAL CAMERA

OLYMPUS DIGITAL CAMERA

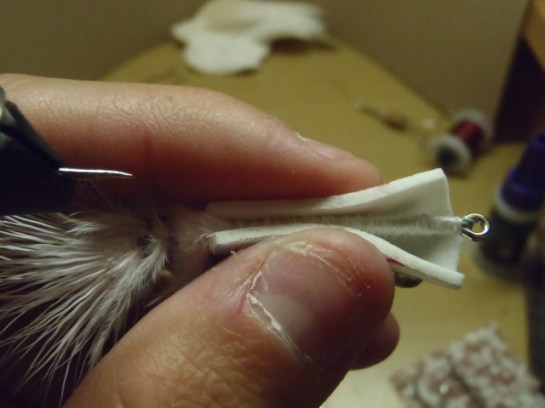
Step 7. Turn the fly upside down and run a good layer of super glue on the bottom of the hook shank. Take your colored foam body and pinch it together along the bottom of the fly making sure that it is also butted against the shank.

OLYMPUS DIGITAL CAMERA

Should end up with something like this.

OLYMPUS DIGITAL CAMERA

OLYMPUS DIGITAL CAMERA

OLYMPUS DIGITAL CAMERA

OLYMPUS DIGITAL CAMERA

Step 8. Finish up any color that you want. I color the lips red and finish the gills on the underside where the two pieces of foam meet. Mix up some epoxy (if I only do one fly, I use 5 minute. For anything more, I use 30) and apply to the surface of the body and inside of the body. Put on a spinner to dry.

OLYMPUS DIGITAL CAMERA

Step 9. The last step is to cut off the front hook using wire cutters. Completed fly.

OLYMPUS DIGITAL CAMERA

OLYMPUS DIGITAL CAMERA

OLYMPUS DIGITAL CAMERA

Proof of concept:

IMG_0487