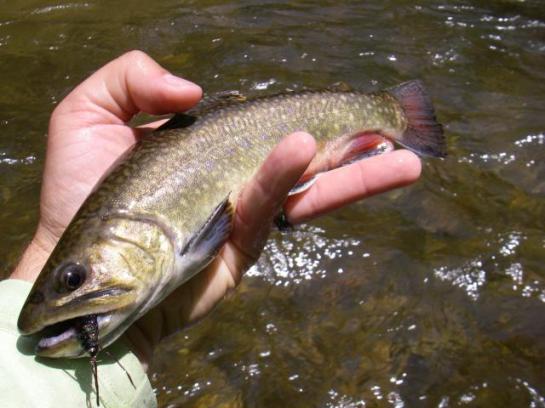
May’s fly of the month is a stonefly pattern that Blake had tied up that proved very effective on the trout at the cabin. Blake notes that “this fly is an amalgam of several different patterns. I just chose the different things I liked from them and put them all together.” Truth is, this wasn’t the pattern that slayed them on Thursday, that was a Pat’s Rubber Legs, a much easier tie, but what fun is that for a SBS. Pick whichever you prefer, as Blake so eloquently stated, “or you could just tie the easier and equally effective “pickle” and not be as ticked off when you lose one on a snag.”
Materials:
– 3x long curved shank hook
– Spanflex legs and ribbing
– Stretch skin for back and casing
– Black and peacock ice dub
– Bead
– Lead wire of various sizes
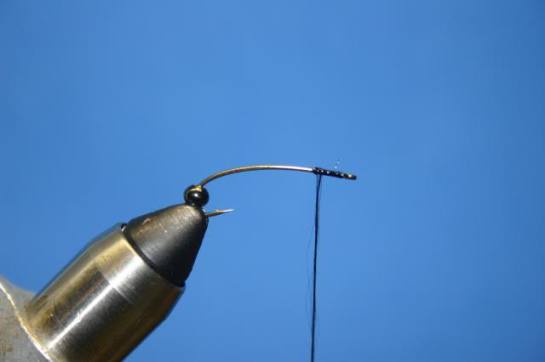
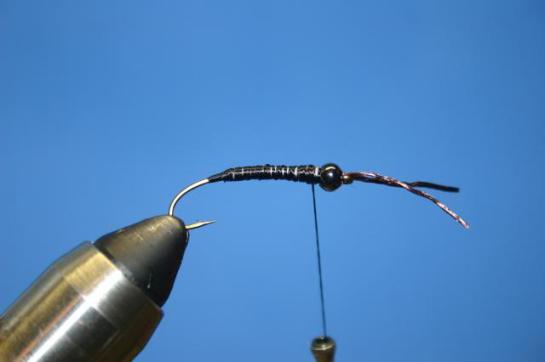
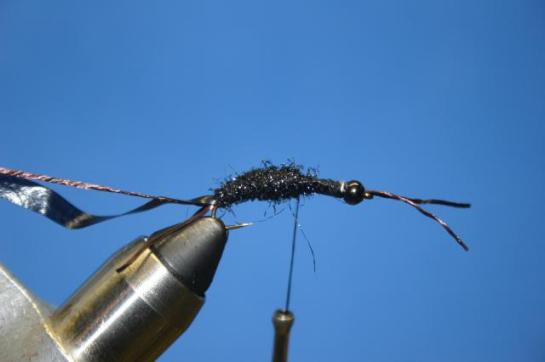
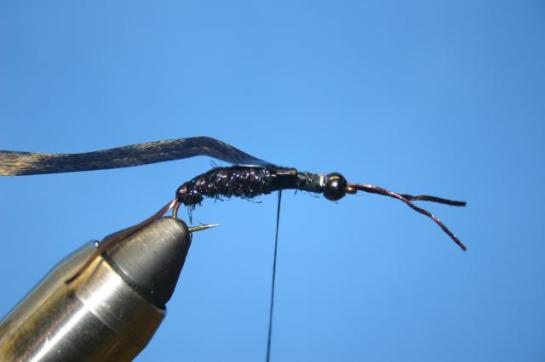
Step 1. Put bead on hook and start thread behind the eye. Make a small thread base and coat with glue.
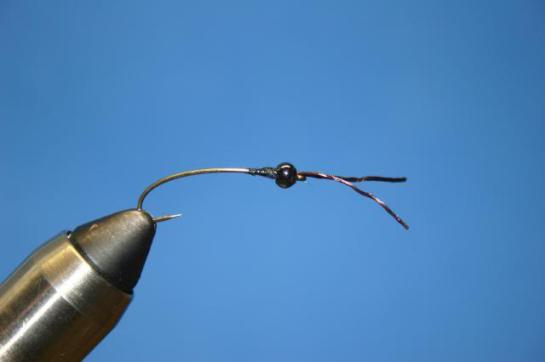
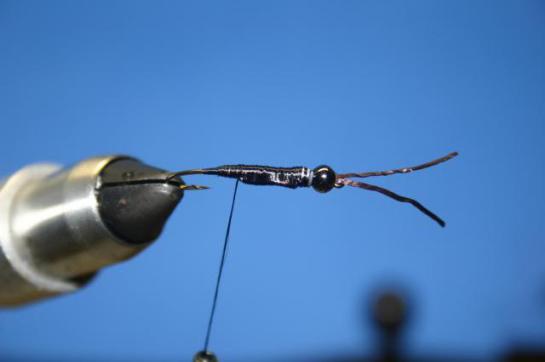
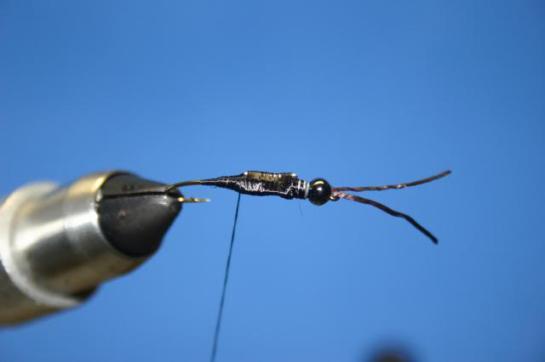
Step 2. Tie in legs to create two antennae. Push bead up over the tie in area to make sure that it will fit. Pull bead back, then whip finish and part off the thread. Add some glue to the tie in area and push bead to the eye to secure it.
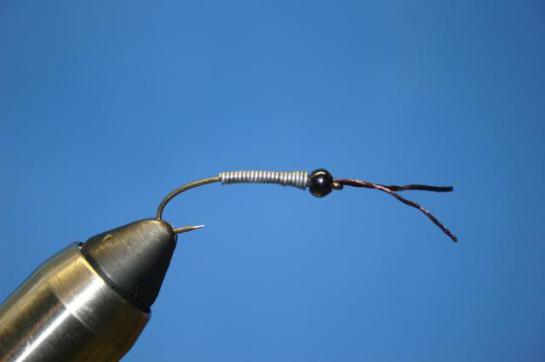
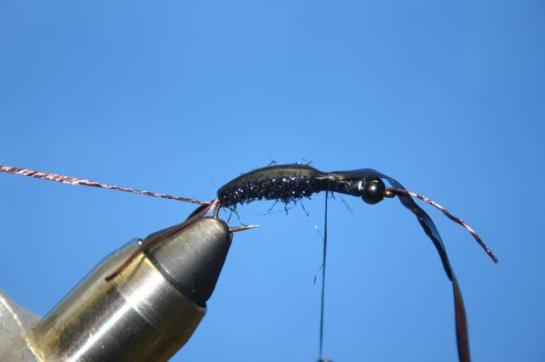
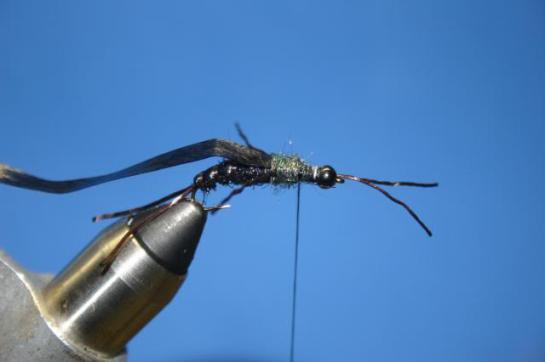
Step 3. Start to build up the body with a layer of lead along the shank up to the back of the bead. I use a good bit of lead on this fly to reduce the amount of shot that I have to put on the line to get it down to where the fish are.
Step 4. Start thread and lay down a layer over the lead.
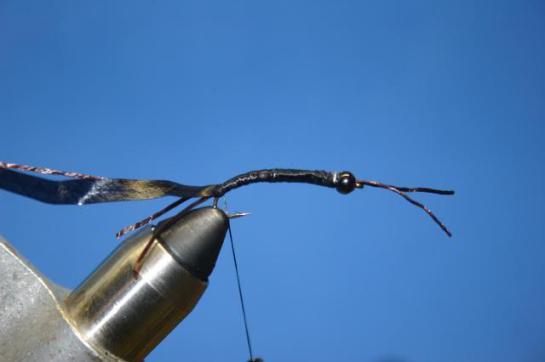
Step 5. Tie in a piece of lead length wise along either side of the hook shank. I used a larger diameter lead wire here. My goal is to make a heavy, vertically compressed body shape with a gradual taper from tail to head.
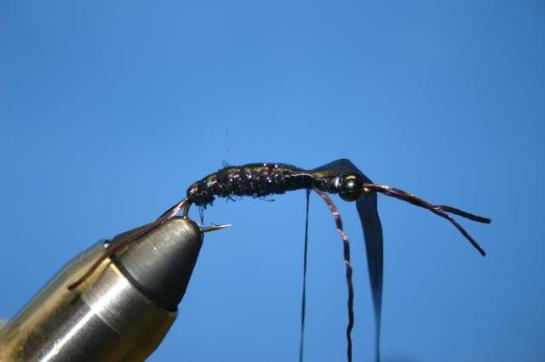
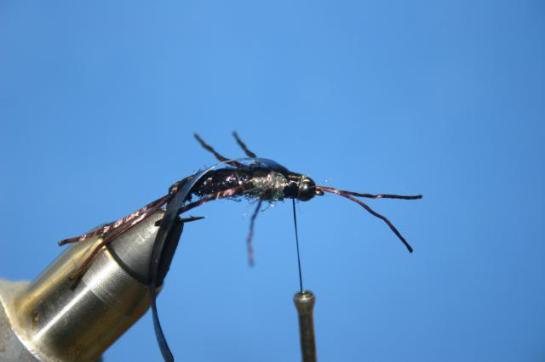
Step 6. Tie in two legs at the back of the fly just as you did at the eye. Notice the shape of the body from the top view above to the one below, vertically compressed with a gradual taper from tail to head.

Step 7. Tie in another piece of spanflex for the ribbing.

Step 8. Tie in the stretchy nymph skin for the back/casing.
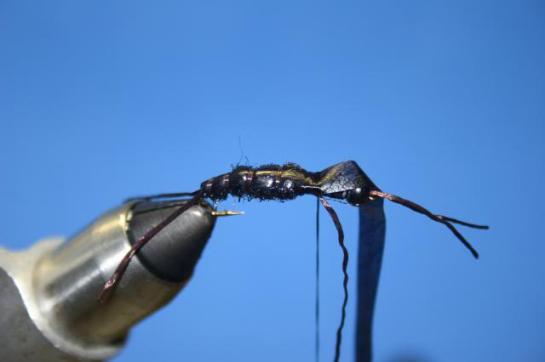
Step 9. Dub the body to a point a little over half way point. I like to make a little contrast between the abdomen and the thorax so I used black ice dub here and peacock ice dub in a future step.
Step 10. Pull the shell back up and tie it in.
Step 11. Rib the abdomen.
Step 12. Cut off the ribbing material and pull the casing back. Tidy up the shank to the spot right before the dubbing starts.
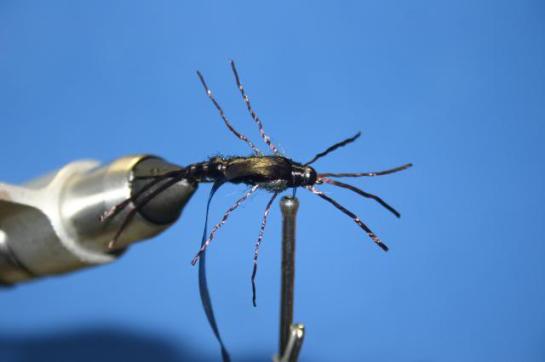
Step 13. Tie in a leg on either side. Dub around the legs and a little down the hook shank.

Step 14. Pull the shell casing over and tie it in. then pull it back and prepare the hook shank for the next leg tie in.

Step 15. Tie in another set of legs, dub, then pull shell casing forward same as you did above.


Step 16. Tie in two more legs. I tied them more forward facing. Dub between the bead and the casing. Pull casing over and tie it in between the legs and the bead.
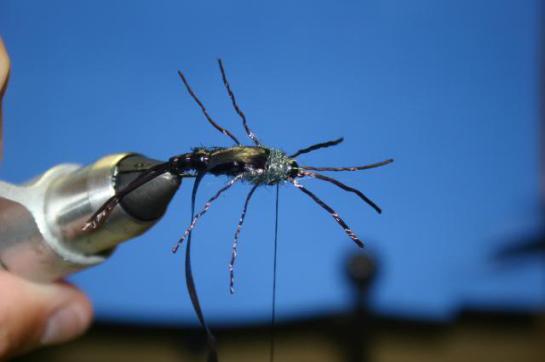

Step 17. Whip finish and you have a completed fly.

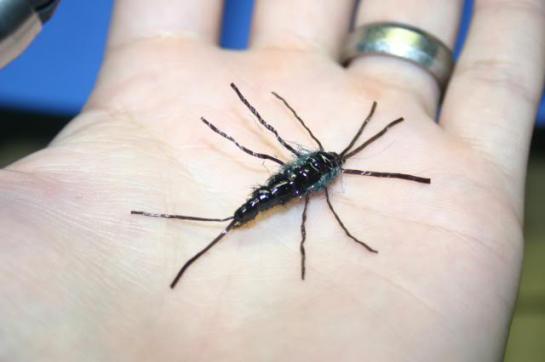
Enjoy, but first some proof of concept.