Kayak Camera Mount
I’ve had a few requests recently to show how I mount my camera while in the kayak. If you’re looking to get the “over-the-shoulder” angle that you see in most of my videos, this is how it’s done. You can see the angle here:
If you use a milkcrate or a BlackPak or anything else that gives you vertical rod holders in the tankwell than this set up will be simple and effective for you. If not they are different products out there that will achieve the same results. I’ve been happy with the products available from YakAttack.
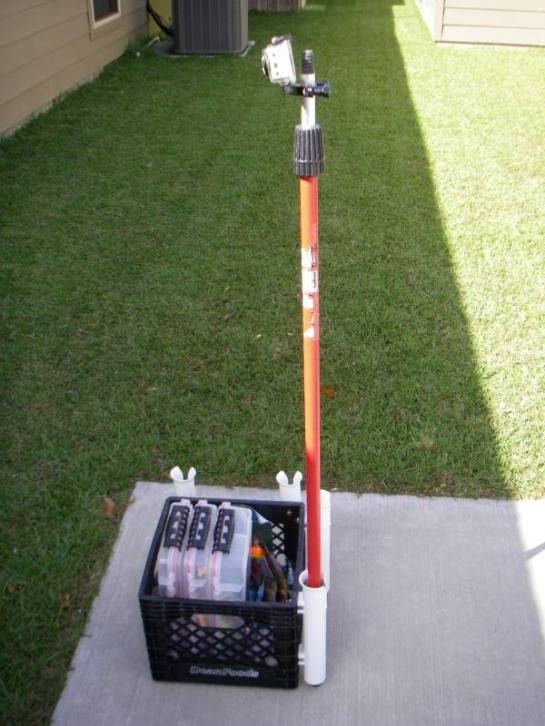
Here’s how I do it – first let’s take a look at the milkcrate:
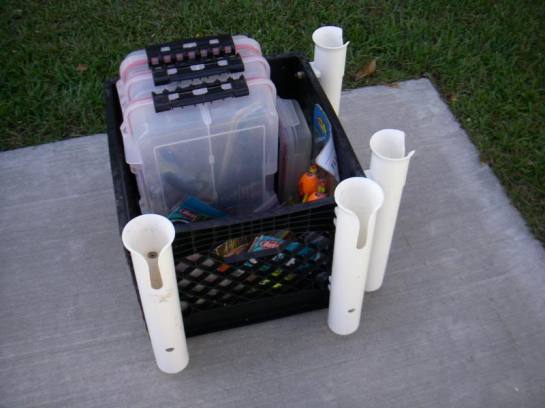

It’s a standard milkcrate that I’ve attached 4 rod holders to. With the 2 that come standard in the Cuda 12, I have 6 total vertical rod holders behind me, which is plenty of storage for rods, a net, and a camera mount. The rod holders were purchased at Academy and are fairly inexpensive. Make sure to install the rodholders as snug as possible to the milkcrate as any looseness will allow for camera shake. Try not to overtighten though because you’re mounting them to plastic, which can, and will break. If you screw them in like I have, use flathead screws to allow for your camera mount to slide in the holder, also use washers on the backside to distribute the load.
Next you will need a pole of some sort that will fit in the rod holder. I use an extension pole that I bought at either Lowe’s or Home Depot. The extension pole came at the suggestion of either Drew Gregory or Sean Brodie, who have been filming much longer than I have and are much better at it as well. The extension pole allows for higher camera angles if I want to do something different, but I’ve found that I just use the lowest possible one because the higher the angle, the more the shake. You also have to turn the camera on and off somehow and it’s easier to reach when it’s lower.

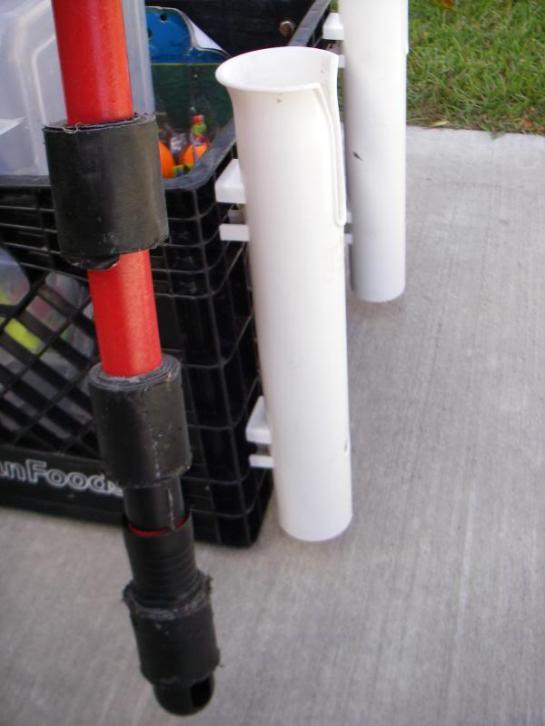
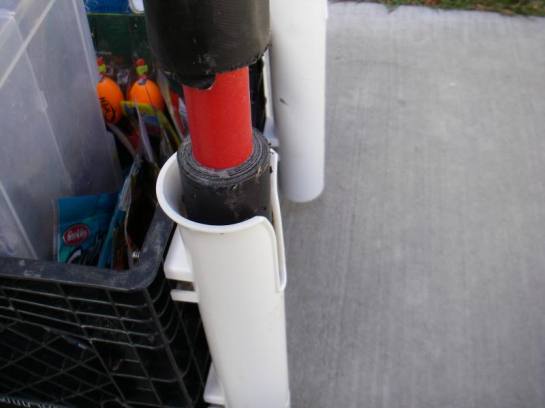


As you can tell from the photos the extension pole doesn’t fit snug in the rod holder, and if it’s not snug the camera will shake. I wrapped the end that goes into the rod holder with Gorilla tape, but regular old duct tape will work, or you can get creative and figure out another way to bulk up the bottom of the extension pole. Tape is nice because you can layer until you get the right amount or reduce if you’ve put too much on there.
Now you’ve got a pole in a rodholder that’s attached to your milkcrate in the tankwell of your kayak. You still need to mount your camera to the pole. I use a GoPro Hero 1 to film. I got it a few years back and it is still kicking so no need to upgrade yet. The GoPro is nice because it is easy to use, comes in a waterproof housing and has several accessories that make mounting it easy. The best way I’ve found to mount a GoPro to an extension pole is with their handlebar/seatpost mount.


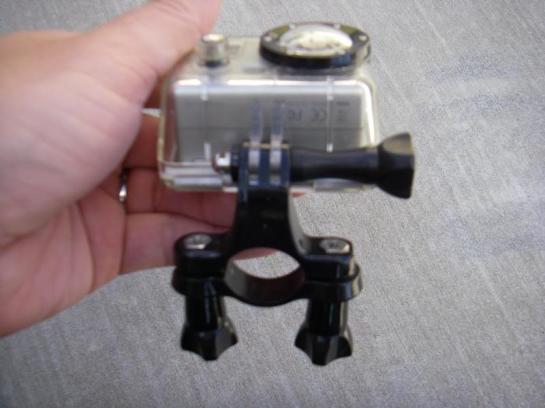
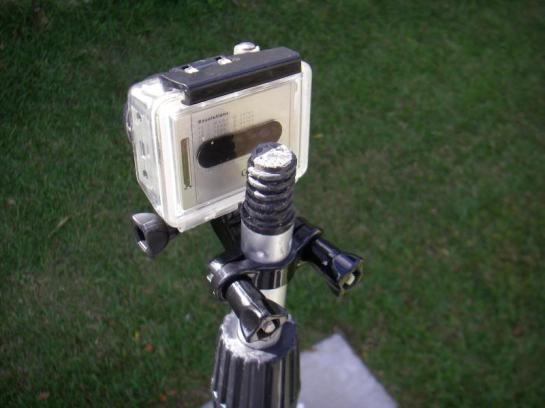

That mount will slide over the extension pole with ease and you can tighten it as much as possible to prevent slippage. The angle of the GoPro you see there is what I generally film at. With the wide angle lens on the GoPro you don’t have to point it downward too much at all to capture everything in front.
That’s all there is to it. It’s simple, snug, and fairly inexpensive. I don’t see too much shake whether I’m sitting or standing in the kayak. You will want to make sure that you use the provided tankwell bungees to strap the milkcrate down, you don’t want it sliding. Here’s how it looks in the kayak:


