Hair Wing Minnow
February’s FOTM is a hair wing minnow. A good choice this time of year as the spawn starts to heat up on our local ponds. It can be tied to mimic both minnows that want to eat fish eggs or recently hatched fingerlings.
Materials:
Streamer Hook
Mylar tubing
Bucktail
Stick on eyes
Epoxy
Step 1. Start thread on the hook and bring to above the barb. I like to use red thread here as a tag.

Step 2. Measure a piece of mylar tubing of your choice that is about as long as the shank of the hook. Tie it in at the bend. Whip finish the red thread at the bend of the hook. If you have a small whip finisher and can’t tie a hand whip finish, just brush some super glue on an inch of thread and make a few wraps. This should hold it good enough till the next step.

Step 3. Pull back the mylar tubing and start the thread on the hook shank directly behind the eye. Let the tubing go and wrap down the ends of the tubing. Wrap the tubing down the shank so that the length is equal the the diameter of your stick on eye of choice. After this, I like to pinch the tubing on either side to make a flat body. Then, coat the red thread and the body (not the chartreuse thread) with Hard as Nails. I normally do one coat, but two will give you a better finish. Make sure you let the first coat dry thoroughly.

Step 4. Cut a clump of bucktail for the first color. I like to go sparse. Chartreuse over white is the best color for me, but many combinations will work. I like to even the tips of the bucktail a little before tying them in. I also choose to wait until all have been tied in to trim the butts.

Step 5. Tie in the chartreuse bucktail over the white trimming the tips just as you did with the white.

Step 6. Trim the butts of the bucktail on an angle and tie them down. A little extra wax on the thread here will help the thread from sliding down the butts and crowding the eye.


Step 7. Use a little super glue on each side to stick on your eyes.

Step 8. Mix up some epoxy and let it spin on the drying wheel.

Step 9. Finished Fly. If you are anything like me, the aesthetic qualities of fly tying are as important as the actual tying process. I don’t particularly care for the flared hair look, so I run many of my flies under some hot water and let the hang by the eye to air dry. This helps to get the sleek minnow shape. I’m sure this doesn’t effect the flies fishability, but it just looks better in my opinion. You can see the difference between the pic in step 7 and the finished fly pics. Enjoy.


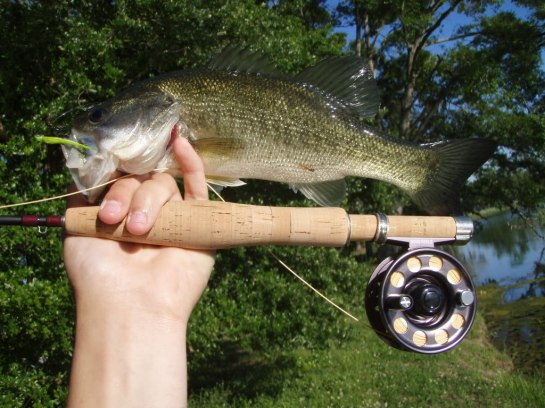
Some proof of concept


I want one of those!
LikeLike
I like this. Really good idea. Think Ill get some ready for nexts weeks trip down around your way.
LikeLike
Where ya headed?
LikeLike